WordPress database error: [The MySQL server is running with the --read-only option so it cannot execute this statement]INSERT INTO `rNSL511dm_adsPage` (`PageID`, `IP`, `Time`, `Count`) VALUES (688, '3.147.70.194', 1742015046, 1)
Installation of Websphere 7 on Linux
a) Before Installation Some planning needs to be done
b) What version of Websphere is required to support your applications?
c) Are there any OS tweaks for the platform required for the chosen version of Websphere?
d) Ensure all the prerequisites are satisfied
e) There are supported browsers on the servers where WAS is going to be installed
f) What version of OS and fix packs are required to support the chosen version of WebSphere?
g) What topology will you be installing and the profiles created
h) Which filesystem to download the software does it have enough space
i) You would need the root or sudo access to install it ( though you can use the non-root installation ) It can get tricky due to permission issues So within the scope of this training we would install using root
j) Ensure that X11 rpms are installed and the Linux server has a GUI or X11 Forwarding enabled
Installation of Websphere Application Server 7 using GUI
1) Getting the Software Package
a) Login to the Passport Advantage using the Customers Login
b) Download and save the software dump to the server where you want to install
c) Ensure there is sufficient space in the filesystem where you are going to extract the files
d) Identify which filesystem you want to install
2) Extracting the WAS 7 Software
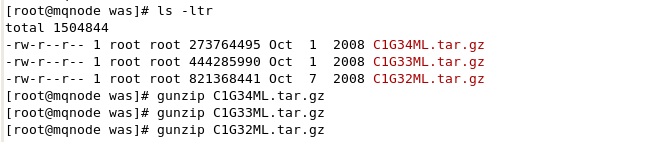
a) Login as root
I have saved the software for WAS 7 at /IbmSoftware/was
b) They are in the *.tar.gz formart
c) Use gunzip to unzip the each files ie there are 3 files
#cd /IbmSoftware/was
#gunzip C1G34ML.tar.gz
Similarly do it for all the files
Screenshot :
d) Ensure all the 3 files are extracted in the same folder
e) Untar all the 3 files in the same location
for eg #tar -xvf C1G34ML.tar
Screenshot :

After the Extraction
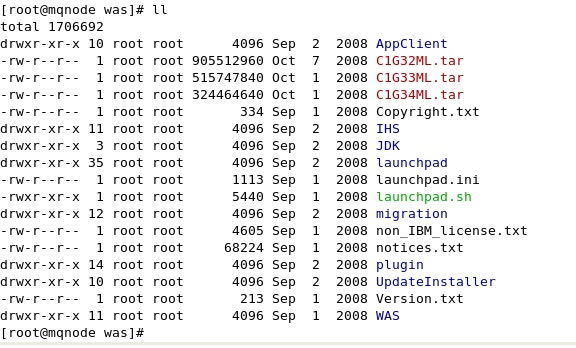
f) After the extraction of all the tar files
3) Execute the ./launchpad.sh
4) Installation wizard welcome screen
It will be presented with the installation wizard welcome screen
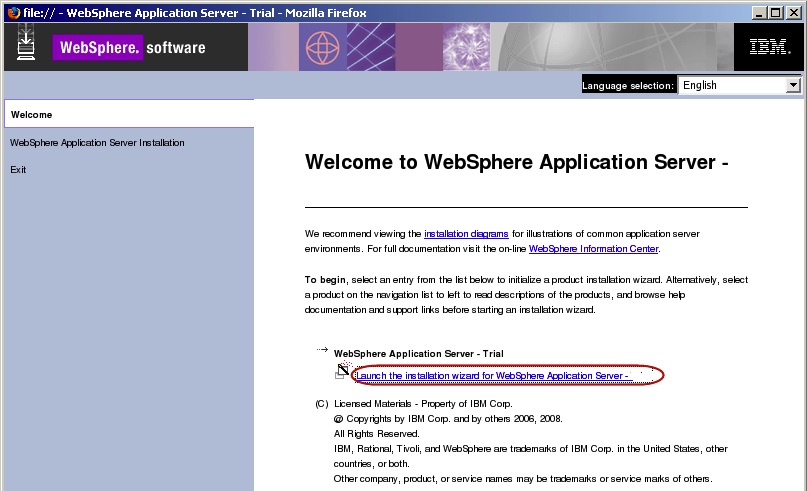
Clicking on Next will take you to the software license agreement screen
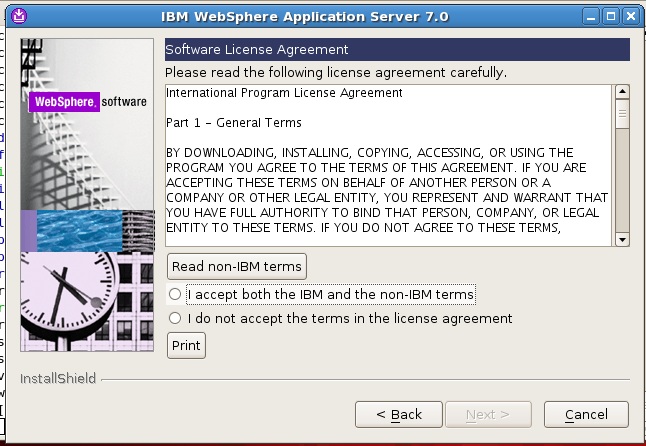
5) Software license agreement
Accept the license agreement and click Next
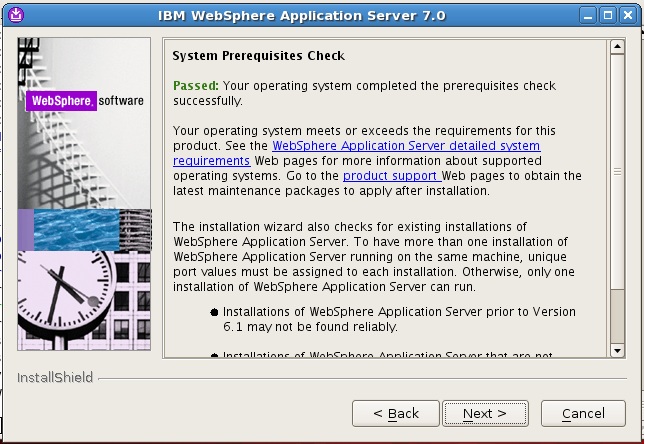
6) System prerequisites check
The installer will check to ensure that your Linux OS meets the required prerequisites.
Click Next
7) Optional features
To enable the installation of samples by checking the Install the Sample applications checkbox.
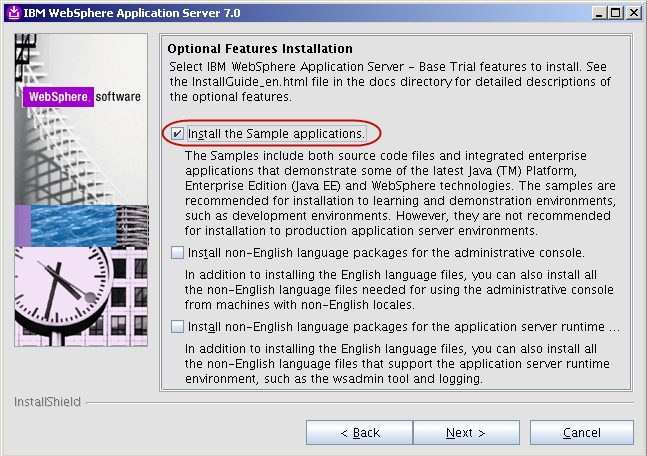
Click Next
8) Installation directory
Specify the path where you want to install the Websphere Binaries.
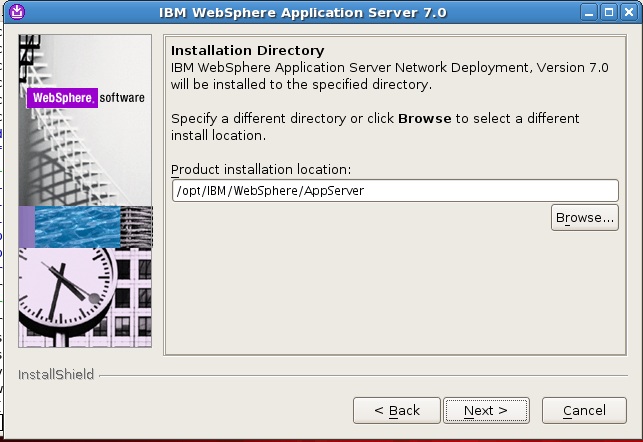
In our case its /opt/IBM/WebSphere/AppServer
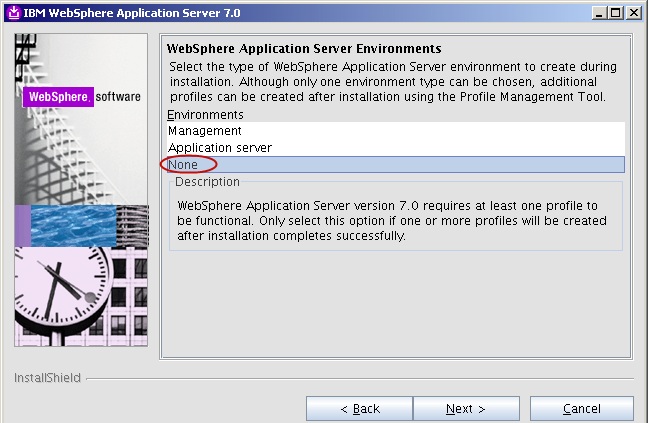
9) Profile Management Tool
After the base binaries are installed, we will use another tool called the Profile Management Tool
to demonstrate how to independently create an application server profile.
We select None .Click Next
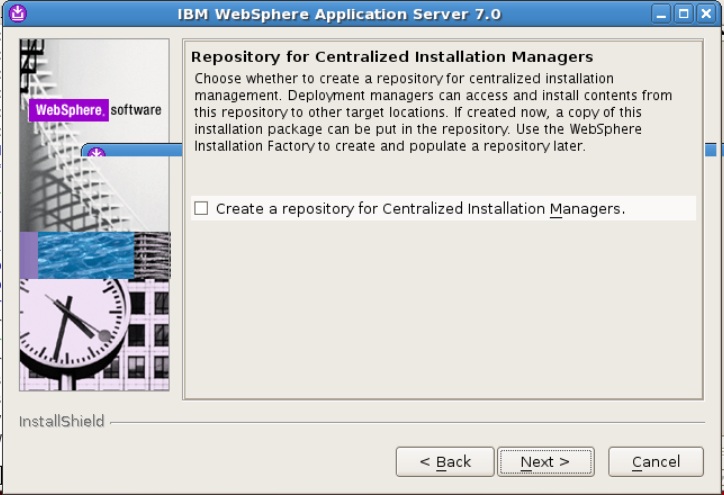
10) Centralized Installation Manager
We don’t select the Repository and we keep it unselected as we dont want to create this repository. Click Next
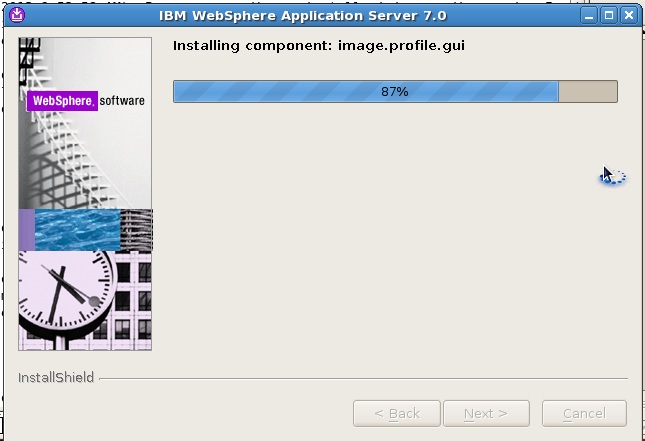
11) Installation Progress
Click Next and the installation process will start and the progress will be shown
12) Successful Installation

Click Finish
13) Validate the Files System where the WAS is installed . In our case its /opt/IBM/WebSpere/AppServer
14) To check to see if the base binaries have installed correctly
Run the WebSphere command script installver.sh which is found in the bin folder
<was_root>/bin/installver.sh
15) This completes the installation of WAS 7 using GUI