Archives

Step by Step: High Availability & Fault Tolerance of Deployment Manager using NFS on Linux

The DETAILED STEPS can be downloaded from the below link

http://webspherepundit.com/wp-content/uploads/2016/08/High-Availability-Fault-Tolerance-of-the-Deployment-Manager-using-NFS-on-Linux.pdf


Abstract:

  • For this exercise a shared filesystem will be created using NFS 4 on which the dmgr profile will be created.
  • This filesystem would be mounted on both the Primary and secondary dmgr servers.
  • Ip alias and host alias would be used during the creation of dmgrs profiles
  • The Ip alias will be active only on one Dmgr at a time either primary or standby depending on the situation of failover or failback.
  • The dmgr process will be running on the node which hosts the ip alias .

NOTE : I have used NFS4 to simulate this scenario .. but in a productions env you could use SAN storage or any similar Technology . Also for the clustering it can be setup using any other OS based clustering available like POWER HA or RHEL Clustering etc

Env Diagram :

WebSphere Version: 8.5.5.0
OS : RHEL 6.5

dmgrHA1

Highlevel Steps :

Step1 : Install and configure NFS 4 on the Server which will hold the Dmgr profile
Step2 : Create the Shared Filesystem for Dmgr profiles on the NFS Server
Step3: Mount shared filesystem on Primary Dmgr : dmgr1.myorg.com  (10.0.0.1)
Step4: Mount shared filesystem on Standby Dmgr : dmgr2.myorg.com  (10.0.0.2)
Step5: Set Ip Alias on the Primary ie dmgr1.myorg.com (10.0.0.1)
Step6: Install WebSphere Application Server on the Primary Dmgr ie dmgr1.myorg.com (10.0.0.1)
Step7: Create the Dmgr profile on dmgr1.myorg.com
Step8: Install WebSpere Application Server on the Application Server Node ie wasnode.myorg.com (10.0.0.3)
Step9: Create AppServer profile on wasnode.myorg.com (10.0.0.3)
Step10: Federate the Appserver Profile from wasnode.myorg.com (10.0.0.3) to the Dmgr Cell
Step11: Install WebSpere Application Server on the Standby  Dmgr ie dmgr2.myorg.com (10.0.0.2)
Step12: Copy profileRegistry.xml from the dmg1.myorg.com to dmg2.myorg.com
Step13: Failover from Primary ie dmgr1.myorg.com ( 10.0.0.1) to the Standby dmgr2.myorg.com (10.0.0.2)
Step14: Testing the Failover to Standby dmgr2.myorg.com ( 10.0.0.2) from Primary ie dmgr1.myorg.com ( 10.0.0.1)
Step15: Failback to Primary ie dmgr1.myorg.com ( 10.0.0.1) from  Standby dmgr2.myorg.com ( 10.0.0.2)


To get automated mail updates of my Posts..
Please subscribe to the site http://webspherepundit.com
And also like the Facebook Page
https://www.facebook.com/webspherepundit


Update Websphere App Server Fixpack using “imcl” command line

 Note : This method to update Websphere Application Server can be used for Any WAS version which uses IBM Installation Manager 

Command : ./imcl install

Current Version : WAS ND 8.5.5.0
New Version : WAS ND 8.5.5.1

Procedure
a) Stop All the WAS Processes ( dmgr, Nodeagent , Server ) Also Apply the Fixpack to Dmgr First before applying to other nodes

b) Take the tar backup of the WAS directories, Profiles, IIM, IIM Data ( var/ibm ) etc to revert in case of any issues

c) Check the Current version of the WAS Installation using Installation Manager Command Line : imcl “./imcl listInstalledPackages”

[root@connections tools]# cd /opt/IBM/InstallationManager/eclipse/tools
[root@connections tools]# ./imcl listInstalledPackages
com.ibm.cic.agent_1.8.2001.20150409_1833
com.ibm.websphere.ND.v85_8.5.5000.20130514_1044

The version is WAS ND 8.5.5.0
Imcl


d) Check the Path of the WAS installation using “./imcl listInstallationDirectories”

[root@connections bin]# cd /opt/IBM/InstallationManager/eclipse/tools
[root@connections tools]# ./imcl listInstallationDirectories
/opt/IBM/WebSphere/AppServer

Imcl3


e) Also Check the Version of WAS using “versionInfo.sh”

[root@connections tools]# cd /opt/IBM/WebSphere/AppServer/bin/
[root@connections bin]# ./versionInfo.sh
WVER0010I: Copyright (c) IBM Corporation 2002, 2012; All rights reserved.
WVER0012I: VersionInfo reporter version 1.15.1.48, dated 2/8/12——————————————————————————–
——————————————————————————–
Name IBM WebSphere Application Server Network Deployment
Version 8.5.5.0
ID ND

Imcl2


f) Extract the Fixpack zip 8.5.5-WS-WASND-FP0000001-part1.zip & 8.5.5-WS-WASND-FP0000001-part2.zip in the same Folder .

I have extracted it in /IBMsoftware/Fixpacks/WASND_8.5.5.1FP/


g) List the Available packages in the fixpack Extracted path ie /IBMsoftware/Fixpacks/WASND_8.5.5.1FP/

Command : ./imcl listAvailablePackages -repositories /IBMsoftware/Fixpacks/WASND_8.5.5.1FP/

[root@connections tools]# ./imcl listAvailablePackages -repositories /IBMsoftware/Fixpacks/WASND_8.5.5.1FP/ com.ibm.websphere.BASE.v85_8.5.5001.20131018_2242
…………………..
com.ibm.websphere.ND.v85_8.5.5001.20131018_2242
………………………..
com.ibm.websphere.NDTRIAL.v85_8.5.5001.20131018_2242
[root@connections tools]#
[root@connections tools]#

Here we can see “com.ibm.websphere.ND.v85_8.5.5001.20131018_2242” Package .. We will upgrade this package as we are using websphere.ND.V8.5.5

Imcl5


h) Update the Fixpack using the imcl command
Command: ./imcl install com.ibm.websphere.ND.v85_8.5.5001.20131018_2242 -repositories /IBMsoftware/Fixpacks/WASND_8.5.5.1FP/ -installationDirectory /opt/IBM/WebSphere/AppServer -acceptLicense -sP

[root@connections tools]# ./imcl install com.ibm.websphere.ND.v85_8.5.5001.20131018_2242 -repositories /IBMsoftware/Fixpacks/WASND_8.5.5.1FP/ -installationDirectory /opt/IBM/WebSphere/AppServer -acceptLicense -sP
25%                  50%                     75%                     100%
——————|——————|——————|——————|
…………………………………………:….

Imcl6


h) After the completion of the above command .  check the updated version of WAS , it should be WAS 8.5.5.1 now .
We can see that the package is now “com.ibm.websphere.ND.v85_8.5.5001.20131018_2242″

[root@connections ]# cd /opt/IBM/InstallationManager/eclipse/tools/
[root@connections tools]# ./imcl listInstalledPackages
com.ibm.cic.agent_1.8.2001.20150409_1833
com.ibm.websphere.ND.v85_8.5.5001.20131018_2242
[root@connections tools]#

Imcl7


i) Check the versionInfo.sh to see if the Version of the WAS has been updated .

[root@connections tools]# cd /opt/IBM/WebSphere/AppServer/bin/
[root@connections bin]# ./versionInfo.sh
WVER0010I: Copyright (c) IBM Corporation 2002, 2012; All rights reserved.
——————————————————————————–Name IBM WebSphere Application Server Network Deployment
Version 8.5.5.1
ID ND ………….

Imcl8


j) Start the Dmgr, NodeAgent, WAS Servers after the fixpack updation and check the SystemOut.log to see if there are any errors

This is how we can easily update the fixpack using imcl


To get regular mail updates on my Posts..
Please subscribe to the site http://webspherepundit.com
And also like the Facebook Page
https://www.facebook.com/webspherepundit

=========================================================================

Create Cell, Custom, Dmgr & App Server Profile in WebSphere with ManageProfile

NOTE:
a) Ensure that necessary permissions are available for the user running manageprofile.sh
b) Ensure that the filesystem has sufficient space for the creation of the profile
c) Please select the appropriate ProfileName , Directory path , CellName, NodeName etc as per your requirement

Cell Profile :
1) Cell profiles are actually two profiles in one profile creation method .
2) It has a deployment manager profile and a federated application server profile.
3) The federation is also automatically done by the profile creation wizard
4) An Application sever “server1” is also created by default
5) The profile can be created on the same host only and cannot span multiple physical servers
6) Its used to create a fast dev or a test environment for the development team

Steps to create a Cell Profile:
Step1 : Navigate to WAS_HOME/bin directory

[root@mercury MyServer]# cd /opt/IBM/WebSphere/AppServer/bin

Execute ./manageprofile.sh

Cell Profile with Minimal Parameters

[root@mercury bin]#./manageprofiles.sh -create -profileName Dmgr02 -adminUserName wasadmin -adminPassword p@ssword -enableAdminSecurity true -cellName mercuryCell01 -nodeName mercuryCellManager01 -profilePath /opt/IBM/WebSphere/AppServer/profiles/Dmgr02 -nodeProfilePath /opt/IBM/WebSphere/AppServer/profiles/AppSrv01 -appServerNodeName mercuryNode02 -templatePath /opt/IBM/WebSphere/AppServer/profileTemplates/cell/dmgr

Cell Profile with advanced options ( Custom Ports , Certificates )

[root@mercury bin]#./manageprofiles.sh -create -profileName Dmgr02 -adminUserName p@sswordwasadmin -adminPassword p@ssword -nodePortsFile /opt/IBM/WebSphere/AppServer/logs/manageprofiles/123_cellNode_portdef.props -enableAdminSecurity true -cellName mercuryCell01 -nodeName mercuryCellManager01 -portsFile /opt/IBM/WebSphere/AppServer/logs/manageprofiles/123_cellDmgr_portdef.props -personalCertDN cn=mercury.com,ou=mercuryCell01,ou=mercuryCellManager01,o=IBM,c=US -profilePath /opt/IBM/WebSphere/AppServer/profiles/Dmgr02 -nodeProfilePath /opt/IBM/WebSphere/AppServer/profiles/AppSrv01 -appServerNodeName mercuryNode02 -enableService false -signingCertDN cn=mercury.com,ou=Root Certificate,ou=mercuryCell01,ou=mercuryCellManager01,o=IBM,c=US -hostName mercury.com -personalCertValidityPeriod 1 -signingCertValidityPeriod 15 -keyStorePassword WEBAS -templatePath /opt/IBM/WebSphere/AppServer/profileTemplates/cell/dmgr

Step2: Checks to ensure proper profile creation
a) Should get an INSTCONSUCCESS message for manageprofile in the <WAS_HOME>/logs/manageprofiles/<ProfileName>_create.log
b) Navigate to the dmgr and appserver profile folders ie  /opt/IBM/WebSphere/AppServer/profiles/Dmgr02 & /opt/IBM/WebSphere/AppServer/profiles/AppSrv01
c) Get the admin console ports from AboutThisProfile.txt or serverindex.xml file for dmgr
d) Start the DMgr, Nodeagent and the server1
e) Check the logs for errors
=====================================================================================
=====================================================================================

Custom Profile
1) A custom profile defines an empty node on a system.
2) The main purpose of this profile is to define a node on a system which can be federated to a cell for management using the DMGR.
3) This profile needs to be federated to the dmgr cell during the profile creation or later using “./addNode.sh dmgr_host soap_port”
4) Before you can federate the custom profile to a cell, you will need to have a running deployment manager.

Steps to create a Custom Profile

Step1 : Navigate to WAS_HOME/bin directory

[root@mercury MyServer]# cd /opt/IBM/WebSphere/AppServer/bin

Execute ./manageprofile.sh

[root@mercury bin]# ./manageprofiles.sh -create -defaultPorts -profileName Custom01 -profilePath /opt/IBM/WebSphere/AppServer/profiles/Custom01 -templatePath /opt/IBM/WebSphere/AppServer/profileTemplates/managed -hostName mercury.com -nodeName mercuryNode01 -federateLater true

Step2: Checks to ensure proper profile creation
a) Should get an INSTCONSUCCESS message for manageprofile in the <WAS_HOME>/logs/manageprofiles/<ProfileName>_create.log
b) Navigate to the /opt/IBM/WebSphere/AppServer/profiles/Custom01
c) Federate the Custom Profile node to the dmgr cell using “./addNode.sh dmgr_host soap_port”
d) Create Application Servers from the dmgr admin console

=====================================================================================
=====================================================================================

Deployment Manager Profile

1) The DMGR is a single administration in websphere application server,
2) Whenever we create a dmgr by default we will get one node, cell and adminconsole,
3) It is mainly used to do the administrative and configuration activities.
4) The application and cutom server profile has to be federate with the dmgr,
5) Once federation process has been done we can manage the servers from dmgr admin console

Steps to create a Deployment Manager Profile

Step1 : Navigate to WAS_HOME/bin directory

[root@mercury MyServer]# cd /opt/IBM/WebSphere/AppServer/bin

Execute ./manageprofile.sh

[root@mercury bin]# ./manageprofiles.sh -create -profileName Dmgr01 -profilePath /opt/IBM/WebSphere/AppServer/profiles/Dmgr01 -templatePath /opt/IBM/WebSphere/AppServer/profileTemplates/management -serverType DEPLOYMENT_MANAGER -cellName Cell01 -nodeName Dmgr01 -hostName mercury.com -enableAdminSecurity true -adminUserName wasadmin -adminPassword passw0rd

Step2 : Checks to ensure proper profile creation
a) Should get an INSTCONSUCCESS message for manageprofile in the <WAS_HOME>/logs/manageprofiles/<ProfileName>_create.log
b) Navigate to the /opt/IBM/WebSphere/AppServer/profiles/Dmgr01
c) Start Dmgr using ./startManager.sh from /opt/IBM/WebSphere/AppServer/profiles/Dmgr01/bin
d) Check logs for Error

=====================================================================================
=====================================================================================

Application Server Profile
1) This Profile is used to create a stand alone application server .
2) It will have its independent runtime JVM environment where we can deploy the application etc
3) This Profile can be later federated a DMGR cell to become part of a bigger deployment environment

Steps to create a Application Server Profile

Step1 : Navigate to WAS_HOME/bin directory

root@mqnode bin]#cd /opt/IBM/WebSphere/AppServer/bin

Execute ./manageprofile.sh

[root@mercury bin]# ./manageprofiles.sh -create -profileName MYPROFILE -profilePath /appprofiles/MYPROFILE -templatePath /opt/IBM/WebSphere/AppServer/profileTemplates/default -serverName TEST_SERVER -nodeName MYPROFILENode1 -hostName mercury.com -enableAdminSecurity true -adminUserName wasadmin -adminPassword wasadmin@12

Step2: Checks to ensure proper profile creation
a) Should get an INSTCONSUCCESS message for manageprofile in the <WAS_HOME>/logs/manageprofiles/<ProfileName>_create.log
b) Navigate to the profile folder ie  /appprofiles/MYPROFILE
c) Start application server using ./startServer.sh TEST_SERVER
d) Check SystemOut.logs for Error

More details on Application Server profile Click here
http://webspherepundit.com/?p=1242


To get automated mail updates of my Posts..
Please subscribe to the site http://webspherepundit.com
And also like the Facebook Page
https://www.facebook.com/webspherepundit


Deploy / Config Changes when the Websphere DMGR is Down

There could be instances when your Websphere Deployment Manager  server is crashed / down due any reasons .
It could be due to
a) Hardware issues
b) OS issues
c) Filesystem corruption
d) Configuration Issues etc ..

Consider a scenario wherein your DMGR is down, and at the same time there is an urgent configuration change / deployment / upgrade you need to do to your application .

In this case you may need to do the changes directly to the Application server node using wsadmin commands

NOTE : This is not a recommended way 

NOTE : WHENEVER THE DMGR IS UP AND RUNNING THE CHANGES WILL BE LOST DURING THE NODE SYNC Process .

NOTE :Once the DMGR is started, you would need to make the changes which you made on Application Server again to the DMGR and do a complete Sync 

NOTE :For a Clustered Environment ,, the below changes needs to be one on each of the Cluster Nodes 

Following are the highlevel steps to deploy the application when the DMGR is down

Step 1 : To simulate that scenario of DMGR Crashed, I have stopped the DMGR using ./stopManager.sh

deploy_without_dmgr14

And the Application Servers is started

deploy_without_dmgr15

Step 2 : Login to the Application Server Node as the owner of the WAS installation .

Step 3 : Launch the wsadmin.sh from the APP_SRV_PROFILE/bin

[root@mercury bin]# cd /opt/IBM/WebSphere/AppServer/profiles/Custom01/bin

Execute wsadmin.sh

[root@mercury bin]# ./wsadmin.sh

deploy_without_dmgr

We will get an Error
“WASX7023E: Error creating “SOAP” connection to host “mercury.com”; exception information: com.ibm.websphere.management.exception.ConnectorNotAvailableException: [SOAPException: faultCode=SOAP-ENV:Protocol; msg=; targetException=java.net.MalformedURLException]”

The reason being that the wsadmin.properties file in the /opt/IBM/WebSphere/AppServer/profiles/Custom01/properties    folder still refers to the   DMGR hostname and DMGR Soap Port

We need to modify the values of the com.ibm.ws.scripting.port and  com.ibm.ws.scripting.host values to match the hostname of Application Server Node

Step 4 : Modify the wsadmin.properties file

[root@mercury bin]# cd /opt/IBM/WebSphere/AppServer/profiles/Custom01/properties

Edit the wsadmin.properties

[root@mercury properties]# vi wsadmin.properties

deploy_without_dmgr2

Currently the port 8879 is the SOAP port of the DMGR ..

Change the com.ibm.ws.scripting.port and  com.ibm.ws.scripting.host values to the values of the Application Server Node

deploy_without_dmgr3

Here 8884 is the Soap Port of My application Server “MyServer”

Save the Changes in the wsadmin.properties file

Step 5 : Now execute the wsadmin.sh from the Application Server  Node

[root@mercury properties]# cd  /opt/IBM/WebSphere/AppServer/profiles/Custom01/bin/


[root@mercury properties]# ./wsadmin.sh -lang jython  -conntype NONE

deploy_without_dmgr4

Step 6 : Deploy the application using wsadmin
In the wsadmin Prompt execute the below command . The DefaultApplication.ear is located in /opt/IBM/WebSphere/AppServer/installableApps/

NOTE : You can use wsadmin interactive Steps to deploy the application too

wsadmin>AdminApp.install(‘/opt/IBM/WebSphere/AppServer/installableApps/DefaultApplication.ear’, ‘[-server MyServer]’)

deploy_without_dmgr16

Save the configurations using AdminConfig.save

wsadmin>AdminConfig.save()

NOTE : You can use wsadmin commands to manipulate other  configurations also of the Application Server

NOTE : These changes will get lost when the dmgr is started

Step 7 : Ensure the wc_default and wc_default_secure port of Application Server is available in the virtualhost.xml .

On the Application Server Node

[root@mercury properties]# cd  /opt/IBM/WebSphere/AppServer/profiles/Custom01/config/cell/Cell01

Search for wc_default port in virtualhost.xml

[root@mercury properties]# cat virtualhost.xml | grep 9082

Search for wc_default_secure port in virtualhost.xml

[root@mercury properties]# cat virtualhost.xml | grep 9445

Where 9082  & 9445 are wc_default and wc_default_secure port of the Applicatioin server “MyServer”

NOTE : If the wc_default and wc_default_secure port of your Application Server is not present in the  virtualhost.xml   you will get the error
“A WebGroup/Virtual Host to handle /snoop has not been defined
SRVE0255E: A WebGroup/Virtual Host to handle localhost:80 has not been defined.”


Step 8 : Start the applications using wsadmin or Restart the application server .. depending on the changes which you have done

[root@mercury properties]# cd /opt/IBM/WebSphere/AppServer/profiles/Custom01/bin
[root@mercury bin]# ./stopServer.sh MyServer
[root@mercury bin]# ./startServer.sh MyServer


Step 9 : Validate if the application has been deployed only to the application node and not the DMGR .

Validation 1 : Check the Application Server SystemOut.log after the Application server / Application is started.

Check the systemOut.log to see if the Application DefaultApplication has started properly .

Also check if the web containers are mapped to the proper ports ..
Refer the screenshot of SystemOut.log

deploy_without_dmgr17

Validation 2 : Check the serverindex.xml  of both  Application Server Node and Dmgr Node

Application Node

[root@mercury mercuryNode01]# cat /opt/IBM/WebSphere/AppServer/profiles/Custom01/config/cells/Cell01/nodes/mercuryNode01/serverindex.xml

deploy_without_dmgr7

deploy_without_dmgr8

Here we can see the Application which we deployed ie DefaultApplication.ear.ear in the serverindex.xml

Dmgr Node

[root@mercury mercuryNode01]# cat /opt/IBM/WebSphere/AppServer/profiles/Dmgr01/config/cells/Cell01/nodes/mercuryNode01/serverindex.xml

deploy_without_dmgr5

deploy_without_dmgr6

Similarly in the Dmgr Node’s Serverindex.xml we can not see the deployed application :DefaultApplication.ear.ear

Validation 3 : Check the <Profile_Home>/config/cells/Cell01/applications folder for the deployed application

Application Server Node

[root@mercury mercuryNode01]# ls -l /opt/IBM/WebSphere/AppServer/profiles/Custom01/config/cells/Cell01/applications

deploy_without_dmgr12

We can see the DefaultApplication.ear.ear in this folder

Dmgr Node

[root@mercury mercuryNode01]# ls -l /opt/IBM/WebSphere/AppServer/profiles/Dmgr01/config/cells/Cell01/applications

deploy_without_dmgr13

There is no DefaultApplication.ear.ear

Step 10 : Check the deployed application using the browser

url : http://IP of the Application Server:wc_default/snoop

As I have deployed the DefaultApplication I will be testing if the application snoop is accessible now on the applicaiton server when the DMGR is down

deploy_without_dmgr9

deploy_without_dmgr11

This shows we can deploy the application directly on the Application Server Node when the DMGR is down

NOTE : As mentioned above these changes will get overwritten when the Node sync happens when the DMGR is started

NOTE :Once the DMGR is started, you would need to make the changes which you made on Application Server again to the DMGR and do a complete Sync 


To get automated mail updates of my Posts..
Please subscribe to the site http://webspherepundit.com
And also like the Facebook Page
https://www.facebook.com/webspherepundit


Changing Inactive Session TimeOut for WAS Admin console

There may be a requirement for changing the Inactive Session Timeout for the Websphere Admin Console .
The default Session timeout of WAS Console is 30 minutes.

We cannot change the session timeout from directly from the Admin console but there are two methods to do it

Method 1 : Using the wsadmin Script

This is the Recommended way to change the Session Expiration timeout value

Step 1 :  The session timeout is saved in the deployment.xml file within the isclite.ear
a) Navigate to the <ProfileHome>/cells/CellName/applications/isclite.ear/deployments/isclite

[root@mercury isclite]# cd /opt/IBM/WebSphere/AppServer/profiles/Dmgr01/config/cells/Cell01/applications/isclite.ear/deployments/isclite

wassessiontimeout6

b) Check the Existing Session timeout value in the deployment.xml
Open the file deployment.xml and search for the parameter “invalidationTimeout”
Here “invalidationTimeout=30” Indicates the session timeout is 30 minutes

wassessiontimeout


Step 2 :  Copy the below following script into a file in the server in any location . I have saved this script in /root/sessiontimeout.jacl

set dep [$AdminConfig getid /Deployment:isclite/]
set appDep [$AdminConfig list ApplicationDeployment $dep]
set sesMgmt [$AdminConfig list SessionManager $appDep]# check if existing sesMgmt there or not, if not then create a new one, if exist then modify it
if {$sesMgmt == “”} {
# get applicationConfig to create new SessionManager
set appConfig [$AdminConfig list ApplicationConfig $appDep]
if {$appConfig == “”} {
# create a new one
set appConfig [$AdminConfig create ApplicationConfig $appDep {}]
# then create a new SessionManager using new Application Config just created
set sesMgmt [$AdminConfig create SessionManager $appConfig {}]
} else {
# create new SessionManager using the existing ApplicationConfig
set sesMgmt [$AdminConfig create SessionManager $appConfig {}]}
}# get tuningParams config id
set tuningParams [$AdminConfig showAttribute $sesMgmt tuningParams]
if {$tuningParams == “”} {
# create a new tuningParams
$AdminConfig create TuningParams $sesMgmt {{invalidationTimeout <timeout value>}}} else {
#modify the existing one
$AdminConfig modify $tuningParams {{invalidationTimeout <timeout value>}}}# saving the configuration changes
$AdminConfig save

wassessiontimeout1

Step 3 :  Change the  on the two lines of this file to the new session expiration value which you want and save the changes to the file. I have specified10 min as session expiration

This number specifies the number of minutes the console preserves the session during  inactivity
wassessiontimeout2

Step 4 :  Run the wsadmin.sh ( you may have to specify the credentials if security is enabled )

bash-3.2$[root@mercury isclite]# cd /opt/IBM/WebSphere/AppServer/profiles/Dmgr01/bin/

Execute wsadmin.sh -lang jacl -f FileName

bash-3.2$[root@mercury bin]# ./wsadmin.sh -lang jacl -f /root/sessiontimeout.jacl

wassessiontimeout3


Step 5 :
 Once the script is run check the deployment.xml to ensure the changes are reflected in it

wassessiontimeout4

Here the changes ie invalidationTimeout=”10″ is updated in deployment.xml file of isclite.ear

Step 6 :  Restart the Dmgr or the Appserver  ( in case of Stand Alone  Server)

bash-3.2$[root@mercury isclite]# cd /opt/IBM/WebSphere/AppServer/profiles/Dmgr01/bin/

Stop Deployment Manager

bash-3.2$[root@mercury isclite]# ./stopManager.sh

Start Deployment Manager 

bash-3.2$[root@mercury isclite]# ./startManager.sh

Step 7 :  Test the session expiry after 10 min of Inactivity in the Websphere Admin console
Method 2: Modifying the deployment.xml

Step 1 :  The session timeout is saved in the deployment.xml file within the isclite.ear
a) Navigate to the <ProfileHome>/cells/CellName/applications/isclite.ear/deployments/isclite

[root@mercury isclite]# cd /opt/IBM/WebSphere/AppServer/profiles/Dmgr01/config/cells/Cell01/applications/isclite.ear/deployments/isclite

wassessiontimeout6

b) Check the Existing Session timeout value in the deployment.xml
Open the file deployment.xml and search for the parameter “invalidationTimeout”
Here “invalidationTimeout=30” Indicates the session timeout is 30 minutes

wassessiontimeout


Step 2 :
 Logout of the WAS admin console if you are allready logged in .

Step 3: Backup the existing deployment.xml file within the isclite.ear  to some other location outside the WAS directory structure. This will ensure you wll be able to revert to the original setting if any issues occurs.

[root@mercury isclite]# cd /opt/IBM/WebSphere/AppServer/profiles/Dmgr01/config/cells/Cell01/applications/isclite.ear/deployments/isclite

I have saved the deployment.xml.org in /root as deployment.xml.org

[root@mercury isclite]# cp deployment.xml /root/deployment.xml.org


Step 4:  Navigate to Go to the following directory,
<ProfileHome>/cells/CellName/applications/isclite.ear/deployments/isclite


Step 5 : Modify the deployment.xml file any editor and update  setting the value of the “invalidationTimeout” parameter to the desired value (In minutes)

wassessiontimeout4

Here the I have update the invalidationTimeout=”10″ in deployment.xml file


Step 6 :  Restart the Dmgr or the Appserver ( in case of Stand Alone  Server)

bash-3.2$[root@mercury isclite]# cd /opt/IBM/WebSphere/AppServer/profiles/Dmgr01/bin/

Stop Deployment Manager

bash-3.2$[root@mercury isclite]# ./stopManager.sh

Start Deployment Manager

bash-3.2$[root@mercury isclite]# ./startManager.sh

Step 7 :  Test the session expiry after 10 min of Inactivity in the Websphere Admin console


Find IBM Java version used by the WAS

Below are the few methods to find out the Java version which is used by the Installed WAS Instance
1.From the System Out Logs
2.Using java -version
3.Using Wsadmin Script
4.Using  VersionInfo.sh

Method 1: From the System Out Logs
a) Navigate to the Folder where the SystemOut.log is available .
Eg : /opt/IBM/WebSphere/AppServer/profiles/wp_profile/logs/WebSphere_Portal

b) Open the SystemOut.log file and see the First Few lines of the Logs

Highlighted in YELLOW is the JDK Version used by the Installed WAS instance .. ie IBM SDK 1.6

was_jdk_version


Method 2: Using  java -version

a) Navigate to $WAS_HOME/java/bin/ ie /opt/IBM/WebSphere/AppServer/java/bin

b) Run “java -version” from  /opt/IBM/WebSphere/AppServer/java/bin

[root@mercury bin]#cd /opt/IBM/WebSphere/AppServer/java/bin
[root@mercury bin]# ./java -version

was_jdk_version1

Highlighted in yellow is the  JDK version used by WAS Installation  ie IBM SDK  1.6 and its 32 bit


Method 3: Using Wsadmin Script

a) Navigate to the $Profile/bin directory
for eg :

[root@mercury WebSphere_Portal]# cd  /opt/IBM/WebSphere/AppServer/profiles/wp_profile/bin

b) Invoke wsadmin.sh with jython language type ( you can use both jacl or jython )

./wsadmin.sh -lang jython

was_jdk_version4

c) Execute the getServerSDK for to get the SDK version of the Server

wsadmin>AdminTask.getServerSDK(‘[-serverName <Server Name> -nodeName <Node Name>]’)

My Server Name for my environment is : WebSphere_Portal
Node Name for my environment is : mercuryNode

wsadmin>AdminTask.getServerSDK(‘[-serverName WebSphere_Portal -nodeName mercuryNode]’)

Here the output is SDKNAME 1.6_32

was_jdk_version2

d) Execute getAvaliableSDKsOnNode to get the avaliabe SDKs which are installed on the specific node.

wsadmin>AdminTask.getAvailableSDKsOnNode(‘[-nodeName mercuryNode]’)

As we have only one SDK installed on this node its displaying the SDK version ‘1.6_32’

was_jdk_version3


Method 4: Using  VersionInfo.sh

a) Navigate to “$WAS_HOME/bin” folder and execute the ./verisonInfo.sh Command
For eg

[root@mercury bin]# cd /opt/IBM/WebSphere/AppServer/bin/
[root@mercury bin]# ./versionInfo.sh

was_jdk_version5


b) Under the “Installed Features” we see the JAVA Version ie “IBM 32-bit SDK for Java, Version 6”


To get automated mail updates of my Posts..
Please subscribe to the site http://webspherepundit.com
And also like the Facebook Page
https://www.facebook.com/webspherepundit


Different ways to find the Version of WAS

There are various ways to check the versions of the WebSphere Application Server Installation
1.Executing VersionInfo.sh
2.Executing genVersionReport.sh
3.Using Wsadmin scripting command
4.Using Admin console
5.Viewing SystemOut.logs

Method 1 : Executing VersionInfo.sh

VersionInfo.sh script within the bin directory will give following details
> Version of the WAS
> Bit type ie 32 bit or 64 bit
> Installation Path
> Architecture  etc

a) Navigate to the bin directory of the WAS_HOME path
[root@mercury bin]#cd /opt/IBM/WebSphere/AppServer/bin

b) Execute ./versionInfo.sh from the bin folder

[root@mercury bin]#./versionInfo.sh

versionInfo

c) View the Output to find the Version Details of the WAS ..

d) Use “#./versionInfo.sh -long ” to get detailed output . It will include the fixes , ifixes etc

e) Use “#./versionInfo.sh -help” to get the other options for avaliable with versioninfo

Here in the below example the version is highlighted in Yellow .
I have installed Websphere ND v8.0.0.5 with 32 Bit


Method 2 : Executing genVersionReport.sh
The genVersionReport command uses the versionInfo command to generate the versionReport.html report file in the current working directory. The report includes a list of installed fix packs and interim fixes. VersionReport.html  can be opened with any borwser

a) Navigate to the bin directory of the WAS_HOME/bin path
[root@mercury bin]#cd /opt/IBM/WebSphere/AppServer/bin

b) Execute genVersionReport.sh from the <WAS_HOME>/bin directory

[root@mercury bin]# ./genVersionReport.sh
genVersionInfo

c) It will create a file versionReport.html in the bin directory as shown below
genVersionInfo1

d) Open the versionReport.html using a browser

genVersionInfo2

Highlighted in Yellow is the Version viz Websphere ND v8.0.0.5 with 32 Bit


Method 3 : Using Wsadmin scripting command
The version details of WAS Installation can be found using the wsadmin commands too..

a) Navigate to the <profile_home>/bin directory
[root@mercury bin]# cd /opt/IBM/WebSphere/AppServer/profiles/wp_profile/bin

b) Get the Cell Name, Node Name and Server Name of the JVM server
[root@mercury bin]# cd /opt/IBM/WebSphere/AppServer/profiles/wp_profile/config/cells/mercuryCell/nodes/
mercuryNode/servers/WebSphere_Portal

In My Example its as follows
Cell Name :
mercuryCell
Node Name :mercuryNode
Server Name : WebSphere_Portal

c) Execute the wsadmin.sh and provide the necessary credentials
[root@mercury bin]# ./wsadmin.sh

d) Set the Server Variable using the Cell , Node and Server Name from above step
wsadmin>set server [$AdminControl completeObjectName cell=CellName,node=NodeName,name=ServerName,type=Server,*]

For Eg
wsadmin>set server [$AdminControl completeObjectName cell=mercuryCell,node=mercuryNode,name=WebSphere_Portal,type=Server,*]

Output of the command WebSphere:name=WebSphere_Portal,process=WebSphere_Portal,platform=proxy,node=mercuryNode,
j2eeType=J2EEServer,version=8.0.0.5,type=Server,mbeanIdentifier=cells/mercuryCell/nodes/
mercuryNode/servers/WebSphere_Portal/server.xml#Server_1358966625559,cell=mercuryCell
,spec=1.0,processType=UnManagedProcess

versionInfo2

e) After the Server Variable is set , Execute the $AdminControl getAttribute $server serverVersion to get the server Version.

wsadmin>$AdminControl getAttribute $server serverVersion

versionInfo3

The Output is similar to VersionInfo.sh which is Websphere ND v8.0.0.5 and its 32 Bit

f) Some More commands to get the Platform Version and the Server Status
wsadmin>$AdminControl getAttribute $server platformVersion

versionInfo4

wsadmin>$AdminControl getAttribute $server state


Method 4 : Using Admin console
a) Login to the WAS admin console
b) Click on the Welcome link on the left side

WAS_VersionInfo

WAS_VersionInfo1

Here we can see the versions

c) Alternatively we could get the version from Product Information link
1) Navigate to Application servers > serverName .
Here my server name is “WebSphere_Portal”

2) Click on Runtime tab
WAS_VersionInfo2
c) On the Runtime tab there is a link on the right Side “Product Information ” Link

WAS_VersionInfo3

d) Click on Application servers > WebSphere_Portal > Product Information > Product Report

WAS_VersionInfo4
Here we will get the version Details of the WAS Version : Websphere ND v8.0.0.5 


Method 5 : Viewing SystemOut.logs
The Version of the WAS is also visible in the SystemLogs
When Ever a systemOut.log is created it appends the few parameters in the starting of the file
>Websphere Version and Build
>Host Operating System
>Java version
>was.install.root etc

a) Navigate to the Logs folder of the Websphere JVM process <profile_root>/logs/<serverName>

[root@mercury]# cd /opt/IBM/WebSphere/AppServer/profiles/wp_profile/logs/Websphere_Portal

b) View the starting few lines  of the systemOut.log using vi or head or more command

Tail_VersionInfo

c) Here we can see the version details of the WAS ie
WebSphere Platform 8.0.0.5 [ND 8.0.0.5 cf051243.01]


To get automated mail updates of my Posts..
Please subscribe to the site http://webspherepundit.com
And also like the Facebook Page
https://www.facebook.com/webspherepundit


Web Based Mode for Ibm Installation Manager 1.8

With the Release of Ibm Installation Manager 1.8.0 , IBM has added one more Mode for Installation/Un-Installation etc of Websphere Product viz the Web Based Mode

So we have the Following Modes in IIM 1.8:
1) Graphical Mode
2) Silent mode
3) Console Mode
4) Web Based Mode

I have downloaded 1.8.2 for Linux from IBM FIX central . Click HERE for the download

NOTE : Use this Mode ONLY if you have trouble accessing the other Modes . Ensure  you have a Very Stable and High Speed Network to try this But I would not Recommend it

If there is any glitch in the network your installation may be in an inconsistent State Hence use Web Based as a Last Resort

Activity :
a) Install IIM 1.8.2
b) Start the ibmim-web Services from IIM
c) Access the IIM using browser
d) Change the port no of Ibmim-web

Steps :
1) Installation of IIM 1.8.2

a) Download IIM 1.8.2 from Fix Central
b) Extract the zip file in the server

ibmim-web1

c) Install IIM so run #./installc -acceptLicense

NOTE : I am installing IIM using root , but you could use any other user which has the rights to install IIM , In that case use userinstc

ibmim-web2

d) After the Installation of IIM 1.8 .2 Verify it using “#./imcl -version

ibmim-web3


2) Start the IIM Web Mode
The Modules needed to run the IIM Web is allready installed with the IIM 1.8.2 installation under /opt/IBM/InstallationManager/eclipse/web/ibmim-web

a)  To start the Webserver which will start the IIM Web Mode execute the “ibmim-web”
Its present in /opt/IBM/InstallationManager/eclipse/web/ibmim-web

Once this command is run it will also prompt the url for accessing the web iim . Here in this case its http://10.0.0.03:9090/ibmim

ibmim-web4

b)  You can run ibmim-web as background using “&”

#/opt/IBM/InstallationManager/eclipse/web/ibmim-web &

ibmim-web5

3) Verify the Process and the Ports
Check the Process and the Port no for ibmim-web using ps and netstat command

# ps -ef | grep ibmim
# netstat -ntlp | grep 9090

ibmim-web6


4) Access the browser to the url “http://10.0.0.03:9090/ibmim” 

Note : Ensure that you have network connectivity from the desktop to the server you are connecting. Also check the proxy settings of the Browser

ibmim-web7


Navigate to the File options of the  IIM

ibmim-web8


Uninstallation Option of IIM using the IIM Web Mode

ibmim-web9


In this way we can use the IIM Web Mode to Installation , Un-Installation etc etc for Websphere Products


===============================================================

Change the Port No for IBM IM – Web 

===============================================================

There may be situations wherein you would want to change the Port No of the IBM IM – Web
It could be due to the following
1) Port no are already used by some other application
2) Company policy to have a specific range of Ports
3) Difficulty in opening the firewall ports etc etc


a) Stop the ibmim-web process
1) You could terminate the process or Break the command prompt using Ctrl+C
2) Or to stop the web server, from the main menu, select File > Stop server.

b) Modify the port
Edit the ibmim-web.ini file to change the port no . This file is within the /opt/IBM/InstallationManager/eclipse/web/ibmim

ibmim-web10

NOTE: Take the backup before  changing it 

There are two parameters like

-Dorg.osgi.service.http.port=9090
-Dorg.osgi.service.http.port.secure=9095

You need to change the port as per your need to both Http and Https Attribute .

ibmim-web11

Below I changed the http port to 9091

ibmim-web12

c) Start the ibmim-web Services
You can run ibmim-web as background using “&”

#/opt/IBM/InstallationManager/eclipse/web/ibmim-web &

e) Access the url “http://10.0.0.03:9091/ibmim”

ibmim-web13


In this way we can change the port no for IBM Installation Manager Web Mode


To get regular mail updates on my Posts..
Please subscribe to the site http://webspherepundit.com
And also like the Facebook Page
https://www.facebook.com/webspherepundit


IMCL Console Mode for Installation

There may be situations where you will not have the access to the GUI mode of Ibm Installation Manager or may find it difficult to installation using response file.

In such cases you could use the Console mode of IIM

A) Using IMCL console mode  we can also install , uninstall upgrade the WAS  Products.

Activity : 
Here i will show a sample to Install “IBM WebSphere SDK Java Technology Edition (Optional) 7.0.4.1”  using IIM Console Mode 

But you can install all the possible software’s supported by IIM

Steps :
1) Ensure All the prerequisites are satisfied etc
2) Execute “imcl -c ” to Launch the Ibm Installation Manager in the Console Mode

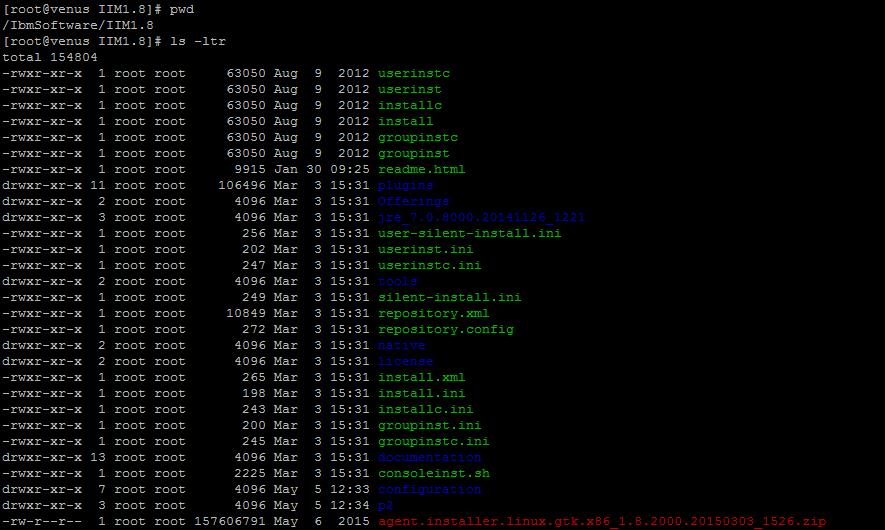
[root@wasnode tools]# ./imcl -c
=====> IBM Installation Manager
Select:
1. Install – Install software packages
2. Update – Find and install updates and fixes to installed software packages
3. Modify – Change installed software packages
4. Roll Back – Revert to an earlier version of installed software packages
5. Uninstall – Remove installed software packagesOther Options:
L. View Logs
S. View Installation History
V. View Installed Packages
————————
P. Preferences
————————
A. About IBM Installation Manager
————————
X. Exit Installation Manager—–> P=====> IBM Installation Manager> PreferencesSelect:
1. Repositories
2. Appearance
3. Files for Rollback
4. SSL/TLS
5. HTTP/FTP Proxy
6. Passport Advantage
7. Updates

R. Return to Main Menu
—–> [1] 1

=====> IBM Installation Manager> Preferences> Repositories

Repositories:
1. [X] /IBMSoftware/was8.5_IHS_8.5/was8.5.5/SDK
2. [X] /IBMSoftware/was8.5_IHS_8.5/was8.5.5/WASND
3. [X] /IBMSoftware/was8.5_IHS_8.5/was8.5.5/WASND/repository.config
4. [X] /IBMSoftware/was8.5_IHS_8.5/was8.5.5/SDK/repository.config

Other Options:
D. Add Repository

S. [X] Search service repositories during installation and updates

R. Restore Defaults
A. Apply Changes and Return to Preferences Menu
P. Temporarily Keep Changes and Return to Preferences Menu

—–> D

=====> IBM Installation Manager> Preferences> Repositories> Add repository

Enter a new repository location. To skip, press Enter:
—–> /IBMSoftware/was8.5_IHS_8.5/was8.5.5/SDK

=====> IBM Installation Manager> Preferences> Repositories> Add repository

ERROR: The repository is already added to the list.

Enter a new repository location. To skip, press Enter:
—–>

=====> IBM Installation Manager> Preferences> Repositories

Repositories:
1. [X] /IBMSoftware/was8.5_IHS_8.5/was8.5.5/SDK
2. [X] /IBMSoftware/was8.5_IHS_8.5/was8.5.5/WASND
3. [X] /IBMSoftware/was8.5_IHS_8.5/was8.5.5/WASND/repository.config
4. [X] /IBMSoftware/was8.5_IHS_8.5/was8.5.5/SDK/repository.config

Other Options:
D. Add Repository

S. [X] Search service repositories during installation and updates

R. Restore Defaults
A. Apply Changes and Return to Preferences Menu
P. Temporarily Keep Changes and Return to Preferences Menu

—–> R

=====> IBM Installation Manager> Preferences> Repositories

Repositories:

Other Options:
D. Add Repository

S. [X] Search service repositories during installation and updates

R. Restore Defaults
A. Apply Changes and Return to Preferences Menu
P. Temporarily Keep Changes and Return to Preferences Menu

—–> D

=====> IBM Installation Manager> Preferences> Repositories> Add repository

Enter a new repository location. To skip, press Enter:
—–> /IBMSoftware/was8.5_IHS_8.5/was8.5.5/SDK
Checking repositories…

=====> IBM Installation Manager> Preferences> Repositories

Repositories:
1. [X] /IBMSoftware/was8.5_IHS_8.5/was8.5.5/SDK

Other Options:
D. Add Repository

S. [X] Search service repositories during installation and updates

R. Restore Defaults
A. Apply Changes and Return to Preferences Menu
P. Temporarily Keep Changes and Return to Preferences Menu

—–> A

=====> IBM Installation Manager> Preferences

Select:
1. Repositories
2. Appearance
3. Files for Rollback
4. SSL/TLS
5. HTTP/FTP Proxy
6. Passport Advantage
7. Updates

R. Return to Main Menu
—–> [1] R

=====> IBM Installation Manager

Select:
1. Install – Install software packages
2. Update – Find and install updates and fixes to installed software packages
3. Modify – Change installed software packages
4. Roll Back – Revert to an earlier version of installed software packages
5. Uninstall – Remove installed software packages

Other Options:
L. View Logs
S. View Installation History
V. View Installed Packages
————————
P. Preferences
————————
A. About IBM Installation Manager
————————
X. Exit Installation Manager

—–> 1
Checking repositories…
Loading repositories…
Checking availability of packages…

=====> IBM Installation Manager> Install

Select packages to install:
1. [ ] IBM WebSphere SDK Java Technology Edition (Optional) 7.0.4.1
2. [ ] IBM WebSphere SDK Java Technology Edition Version 7.0 for Liberty 7.0.4.1

O. Check for Other Versions, Fixes, and Extensions

C. Cancel
—–> [C] 1

=====> IBM Installation Manager> Install> Select

IBM WebSphere SDK Java Technology Edition (Optional) 7.0.4.1

Options:
1. Choose version 7.0.4.1 for installation.
2. Show all available versions of the package.

C. Cancel
—–> [1] 2

=====> IBM Installation Manager> Install> Select> Versions

IBM WebSphere SDK Java Technology Edition (Optional)

Available versions:
1. [X] Version 7.0.4.1

Other Options:
O. OK, C. Cancel
—–> [O]
Preparing and resolving the selected packages…
Loading fixes…

=====> IBM Installation Manager> Install

Select packages to install:
1. [X] IBM WebSphere SDK Java Technology Edition (Optional) 7.0.4.1
2. [ ] IBM WebSphere SDK Java Technology Edition Version 7.0 for Liberty 7.0.4.1

O. Check for Other Versions, Fixes, and Extensions

N. Next, C. Cancel
—–> [N]
Finding compatible package groups…
.

=====> IBM Installation Manager> Install> Location

Existing package groups:
1. [X] IBM WebSphere Application Server V8.5

Selected group id: “IBM WebSphere Application Server V8.5”
Selected location: “/opt/IBM/WebSphere/AppServer”

B. Back, N. Next, C. Cancel
—–> [N]

=====> IBM Installation Manager> Install> Location> Summary

Target Location:
Package Group Name : IBM WebSphere Application Server V8.5
Installation Directory : /opt/IBM/WebSphere/AppServer
Shared Resources Directory : /opt/IBM/IMShared

Packages to be installed:
IBM WebSphere SDK Java Technology Edition (Optional) 7.0.4.1

Options:
G. Generate an Installation Response File

B. Back, I. Install, C. Cancel
—–> [I]
25%                    50%                    75%                     100%
——————|——————|——————|——————|
……………………………………………………………………………………………

=====> IBM Installation Manager> Install> Location> Summary> Completion

The install completed successfully.

Options:
F. Finish
—–> [F]

=====> IBM Installation Manager

Select:
1. Install – Install software packages
2. Update – Find and install updates and fixes to installed software packages
3. Modify – Change installed software packages
4. Roll Back – Revert to an earlier version of installed software packages
5. Uninstall – Remove installed software packages

Other Options:
L. View Logs
S. View Installation History
V. View Installed Packages
————————
P. Preferences
————————
A. About IBM Installation Manager
————————
X. Exit Installation Manager

—–> V

=====> IBM Installation Manager> Installed Packages

View the following installed packages and fixes. Enter the number to see the details of a package group, package, or fix.
1-. IBM WebSphere Application Server V8.5
2. IBM WebSphere Application Server Network Deployment 8.5.5.0
3. IBM WebSphere SDK Java Technology Edition (Optional) 7.0.4.1

Other Options:
O. OK

—–> [O]

=====> IBM Installation Manager

Select:
1. Install – Install software packages
2. Update – Find and install updates and fixes to installed software packages
3. Modify – Change installed software packages
4. Roll Back – Revert to an earlier version of installed software packages
5. Uninstall – Remove installed software packages

Other Options:
L. View Logs
S. View Installation History
V. View Installed Packages
————————
P. Preferences
————————
A. About IBM Installation Manager
————————
X. Exit Installation Manager

—–> X

==================================================================

We have installed “IBM WebSphere SDK Java Technology Edition (Optional) 7.0.4.1”  for the existing WAS Installation


============================================================

B) Check for the installation Completion

[root@wasnode tools]# ./imcl listInstalledPackages
com.ibm.cic.agent_1.6.2000.20130301_2248
com.ibm.websphere.IBMJAVA.v70_7.0.4001.20130510_2103
com.ibm.websphere.ND.v85_8.5.5003.20140730_1249


C) Similarly you can use the IMCL console mode for the Installation , Updation and Installation

===========================================================

To get regular mail updates on my Posts..
Please subscribe to the site http://webspherepundit.com
And also like the Facebook Page
https://www.facebook.com/webspherepundit

Websphere Application Server Fixpack Installation using IMCL

Steps to Install a WAS  FixPack

a) Check if the Fixpack which you are going to install will be compatible with the WAS, OS , Applications which runs on it etc
b) Download the Fixpack from the IBM Fix Central
c) Extract the Fixpack
d) Run “versionInfo.sh -long” to get the version before fixpack

NOTE : TAKE THE BACKUP OF THE IIM Installation PATH and DATA Path , TAKE THE BACKUP OF THE COMPLETE WAS INSTALLATION DIRECTORY


/opt/IBM/WebSphere/AppServer/bin/versionInfo.sh -long > ~/versionInfo_beforeFixpack.txt


[root@wasnode tools]# /opt/IBM/WebSphere/AppServer/bin/versionInfo.sh
WVER0010I: Copyright (c) IBM Corporation 2002, 2012; All rights reserved.
WVER0012I: VersionInfo reporter version 1.15.1.48, dated 2/8/12——————————————————————————–
IBM WebSphere Product Installation Status Report
——————————————————————————–Report at date and time March 12, 2015 9:27:36 PM ISTInstallation
——————————————————————————–
Product Directory /opt/IBM/WebSphere/AppServer
Version Directory /opt/IBM/WebSphere/AppServer/properties/version
DTD Directory /opt/IBM/WebSphere/AppServer/properties/version/dtd
Log Directory /var/ibm/InstallationManager/logsProduct List
——————————————————————————–
ND installedInstalled Product
——————————————————————————–
Name IBM WebSphere Application Server Network Deployment
Version 8.5.5.0
ID ND
Build Level gm1319.01
Build Date 5/14/13
Package com.ibm.websphere.ND.v85_8.5.5000.20130514_1044
Architecture x86 (32 bit)
Installed Features IBM 32-bit WebSphere SDK for Java
WebSphere Application Server Full Profile

e) Stop All the JAVA Processes like dmgr , nodeagent or servers based on which server you are installing
f) For a distributed server , Apply Fixpack for the DMGR first and then the Nodes
g) Execute ./imcl listInstalledPackages to check the versions currently Installed

[root@wasnode tools]# ./imcl listInstalledPackages
com.ibm.cic.agent_1.6.2000.20130301_2248
com.ibm.websphere.IBMJAVA.v70_7.0.4001.20130510_2103
com.ibm.websphere.ND.v85_8.5.5000.20130514_1044
[root@wasnode tools]#

h) Execute ./imcl listInstalledPackages to check the directory where WAS currently Installed

[root@wasnode tools]# ./imcl listInstallationDirectories
/opt/IBM/WebSphere/AppServer

i) List the packages which are available in the Fixpack extracted Directory “/IBMSoftware/was8.5_IHS_8.5/was8.5.5/FP/”

We need to update “com.ibm.websphere.ND.v85” Package as the Product which is installed is “com.ibm.websphere.ND.v85_8.5.5000.20130514_1044”  ( From the versionInfo and listInstalledPackages )

[root@wasnode tools]# ./imcl listAvailablePackages -repositories /IBMSoftware/was8.5_IHS_8.5/was8.5.5/FP/
com.ibm.websphere.BASE.v85_8.5.5003.20140730_1249
com.ibm.websphere.BASETRIAL.v85_8.5.5003.20140730_1249
com.ibm.websphere.DEVELOPERS.v85_8.5.5003.20140730_1249
com.ibm.websphere.DEVELOPERSILAN.v85_8.5.5003.20140730_1249
com.ibm.websphere.EXPRESS.v85_8.5.5003.20140730_1249
com.ibm.websphere.EXPRESSTRIAL.v85_8.5.5003.20140730_1249
com.ibm.websphere.ND.v85_8.5.5003.20140730_1249
com.ibm.websphere.NDDMZ.v85_8.5.5003.20140730_1249
com.ibm.websphere.NDDMZTRIAL.v85_8.5.5003.20140730_1249
com.ibm.websphere.NDTRIAL.v85_8.5.5003.20140730_1249

j) Install the Fixpack by running “imcl install”

Command: imcl install packageID[_version][,featureID]
-repositories source_repository
-installationDirectory installation_directory
-acceptLicense
-sP — Show Progress

[root@wasnode tools]# ./imcl install com.ibm.websphere.ND.v85_8.5.5003.20140730_1249 -repositories /IBMSoftware/was8.5_IHS_8.5/was8.5.5/FP -installationDirectory /opt/IBM/WebSphere/AppServer -acceptLicense -sP
                         25%                       50%                     75%                     100%
——————|——————|——————|——————|
……………………………………………………………………………………………Updated to com.ibm.websphere.ND.v85_8.5.5003.20140730_1249 in the /opt/IBM/WebSphere/AppServer directory.

k) Verify the Installation
We will see that the Websphter.ND is v85_8.5.5003.20140730

[root@wasnode tools]# ./imcl listInstalledPackages
com.ibm.cic.agent_1.6.2000.20130301_2248
com.ibm.websphere.IBMJAVA.v70_7.0.4001.20130510_2103
com.ibm.websphere.ND.v85_8.5.5003.20140730_1249


[root@wasnode tools]# /opt/IBM/WebSphere/AppServer/bin/versionInfo.sh
WVER0010I: Copyright (c) IBM Corporation 2002, 2012; All rights reserved.
WVER0012I: VersionInfo reporter version 1.15.1.48, dated 2/8/12——————————————————————————–
IBM WebSphere Product Installation Status Report
——————————————————————————–Report at date and time March 12, 2015 10:41:14 PM ISTInstallation
——————————————————————————–
Product Directory /opt/IBM/WebSphere/AppServer
Version Directory /opt/IBM/WebSphere/AppServer/properties/version
DTD Directory /opt/IBM/WebSphere/AppServer/properties/version/dtd
Log Directory /var/ibm/InstallationManager/logsProduct List
——————————————————————————–
ND installed
IBMJAVA7 installedInstalled Product
——————————————————————————–
Name IBM WebSphere Application Server Network Deployment
Version 8.5.5.3
ID ND
Build Level cf031430.01
Build Date 7/30/14
Package com.ibm.websphere.ND.v85_8.5.5003.20140730_1249
Architecture x86 (32 bit)
Installed Features IBM 32-bit WebSphere SDK for Java
WebSphere Application Server Full Profile
EJBDeploy tool for pre-EJB 3.0 modules
Embeddable EJB container
Stand-alone thin clients and resource adapters

l) Recheck the Ownership of the “/opt/IBM/WebSphere/AppServer” change the ownership to the owner of the WAS Instance

[root@wasnode tools]# chown -R wasadmin:wasadmin /opt/IBM/WebSphere/AppServer

m) Start the JVM servers and veiw the System logs to check if there are any errors


To get regular mail updates on my Posts..
Please subscribe to the site http://webspherepundit.com
And also like the Facebook Page
https://www.facebook.com/webspherepundit