Archives

Important IMCL Commands

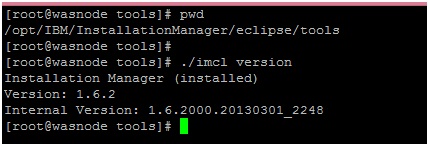
 1: Check the version of IBM Installation Manager

Command: ./imcl version

[root@wasnode tools]# pwd
/opt/IBM/InstallationManager/eclipse/tools
[root@wasnode tools]#
[root@wasnode tools]# ./imcl version
Installation Manager (installed)
Version: 1.6.2
Internal Version: 1.6.2000.20130301_2248
[root@wasnode tools]#

imclversion

=========================================================================
 2: List Installed Packages
Command: ./imcl listInstalledPackages

[root@wasnode tools]# ./imcl listInstalledPackages
com.ibm.cic.agent_1.6.2000.20130301_2248
com.ibm.websphere.IBMJAVA.v70_7.0.4001.20130510_2103
com.ibm.websphere.ND.v85_8.5.5003.20140730_1249

====> com.ibm.websphere.IBMJAVA.v70_7.0.4001.20130510_2103   JAVA SDK
====> com.ibm.websphere.ND.v85_8.5.5003.20140730_1249              WAS ND 8.5

imclinstalledversion
=========================================================================
 3: List Installed Directory
Command: ./imcl listInstallationDirectories

[root@wasnode tools]# ./imcl listInstallationDirectories
/opt/IBM/WebSphere/AppServer

The Installation of WAS ND and SDK is done at “/opt/IBM/WebSphere/AppServer

imclinstalleddirectory
=========================================================================
 4) Uninstalling packages by using imcl
Command: ./imcl uninstall
Uninstall packages from the tools directory by using Installation Manager command line (imcl) uninstall commands.
Before you begin
•To identify the package_id_version,feature_id, run the listAvailablePackages command.

Procedure
To uninstall a package by using imcl:
1) Navigate to the tool directory
2) Run the uninstall command: using imcl

imcl uninstall package_id_version,feature_id -installationDirectory installation_directory

NOTE : There are many options available with imcl, use that as per your requirement

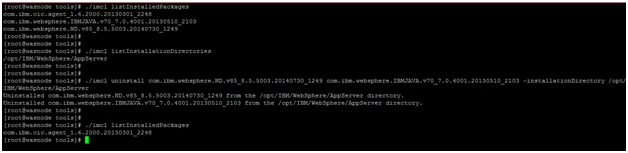
3) List the Installed packages to verify the packages you want to uninstall
BE VERY CAREFUL BEFORE YOU SELECT THE PACKAGE IDs .. Bcoz there may be many Other Websphere Packages installed on different directories

[root@wasnode tools]# ./imcl listInstalledPackages
com.ibm.cic.agent_1.6.2000.20130301_2248
com.ibm.websphere.IBMJAVA.v70_7.0.4001.20130510_2103
com.ibm.websphere.ND.v85_8.5.5003.20140730_1249

We will be uninstalling “com.ibm.websphere.IBMJAVA.v70_7.0.4001.20130510_2103 com.ibm.websphere.ND.v85_8.5.5003.20140730_1249″

4) List the directories where the Websphere Packages are installed
BE VERY CAREFUL BEFORE YOU SELECT THE PACKAGE IDs .. Bcoz There many be many Other Websphere Packages installed on different directories

[root@wasnode tools]# ./imcl listInstallationDirectories
/opt/IBM/WebSphere/AppServer
[root@wasnode tools]#

Here I have only one location where WAS is installed

5) Launch the uninstall option for imcl command line

[root@wasnode tools]# ./imcl uninstall com.ibm.websphere.ND.v85_8.5.5003.20140730_1249 com.ibm.websphere.IBMJAVA.v70_7.0.4001.20130510_2103 -installationDirectory /opt/IBM/WebSphere/AppServer
[root@wasnode tools]#

6) Validate it using “imcl listInstalledPackages” to ensure the WAS packages are removed

[root@wasnode tools]# ./imcl listInstalledPackages
com.ibm.cic.agent_1.6.2000.20130301_2248
[root@wasnode tools]#

7) Delete the WAS Installed Folders post un-installation
/opt/IBM/WebSphere/AppServer

imcluninstall

Video

This is how we uninstall WAS ND
=========================================================================
 5: List Available Packages in the Repositories

Command: ./imcl listAvailablePackages
You need to use “imcl listAvailablePackages” command . It will display the Offerings and packages within the Repositories.

[root@wasnode tools]# ./imcl listAvailablePackages -repositories /IBMSoftware/was8.5_IHS_8.5/was8.5.5/WASND
com.ibm.websphere.ND.v85_8.5.5000.20130514_1044[root@wasnode tools]#
[root@wasnode tools]# ./imcl listAvailablePackages -repositories /IBMSoftware/was8.5_IHS_8.5/was8.5.5/SDK
com.ibm.websphere.IBMJAVA.v70_7.0.4001.20130510_2103
com.ibm.websphere.liberty.IBMJAVA.v70_7.0.4001.20130510_2103
[root@wasnode tools]#

=========================================================================

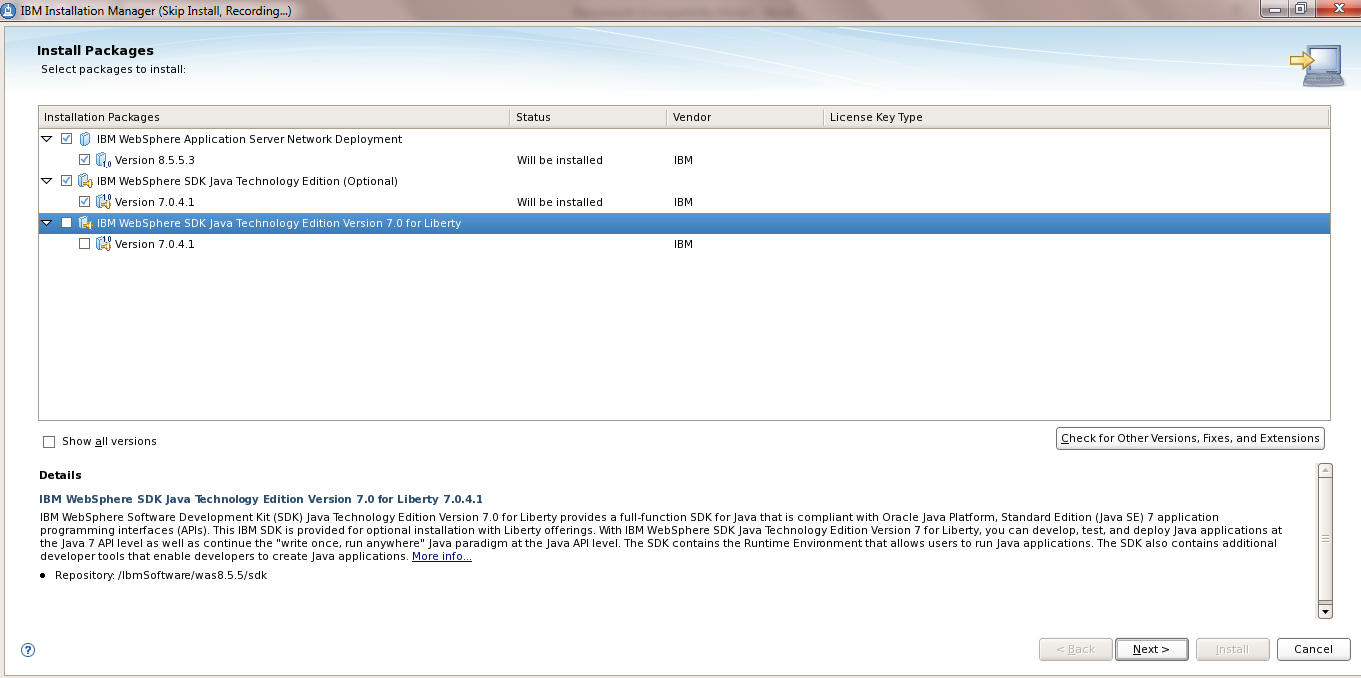
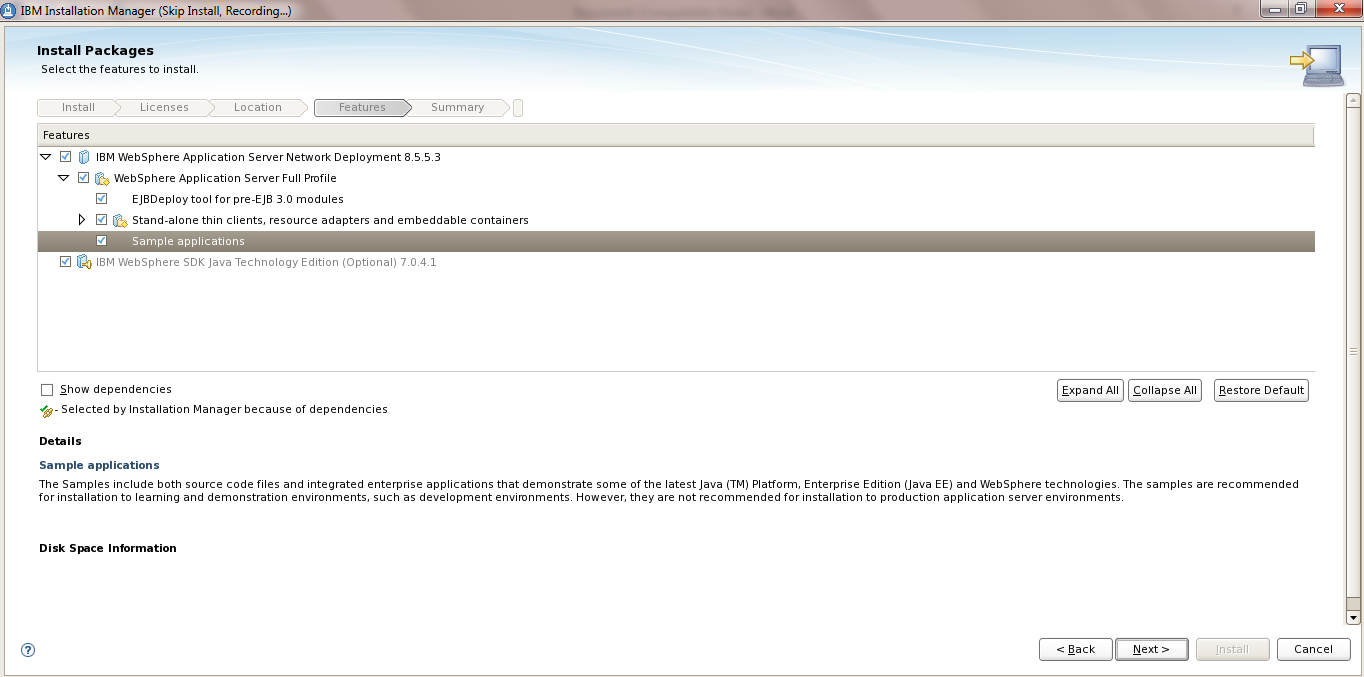
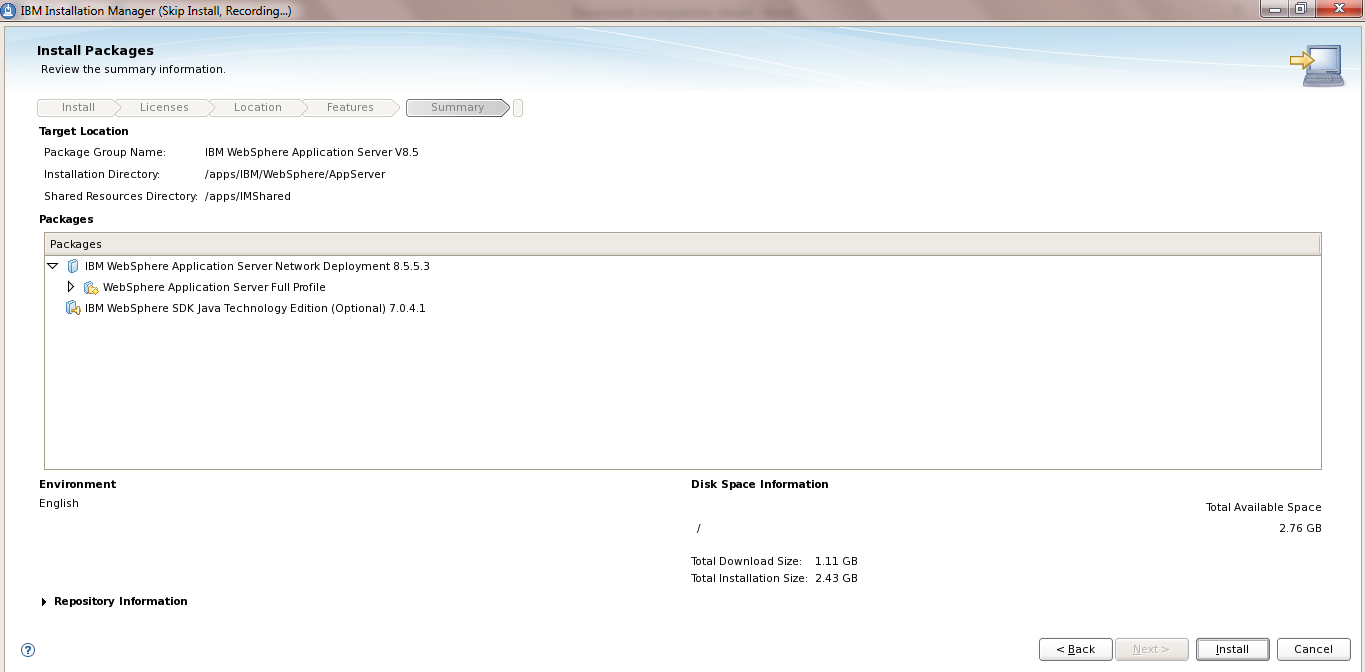
 6: Install of Websphere ND 8.5 using imcl command line

Command: ./imcl install
To install the Product using imcl command you need to use “install” Option of imcl
a) Ensure all the prerequisites are satisfied like space , permission etc
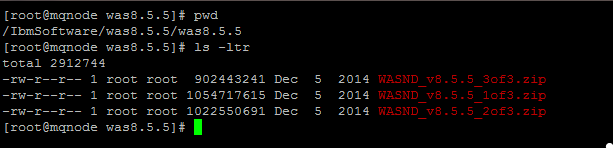
b) Extract the WAS binaries in the server which you have downloaded
c) Execute the “imcl listAvailablePackages “ in the repository to validate the packages

[root@wasnode tools]# cd /opt/IBM/InstallationManager/eclipse/tools
[root@wasnode tools]# ./imcl listAvailablePackages -repositories /IBMSoftware/was8.5_IHS_8.5/was8.5.5/WASND

com.ibm.websphere.ND.v85_8.5.5000.20130514_1044
[root@wasnode tools]#

d) Execute “imcl install” to Install the WAS ND Packages “com.ibm.websphere.ND.v85_8.5.5000.20130514_1044”

[root@wasnode tools]#./imcl install com.ibm.websphere.ND.v85_8.5.5000.20130514_1044 -repositories /IBMSoftware/was8.5_IHS_8.5/was8.5.5/WASND -installationDirectory /opt/IBM/WebSphere/AppServer -acceptLicense -sP
25%               50%                     75%                       100%
——————|——————|——————|——————|
……………………………………………………………………………………………
Installed com.ibm.websphere.ND.v85_8.5.5000.20130514_1044 to the /opt/IBM/WebSphere/AppServer directory.
[root@wasnode tools]#

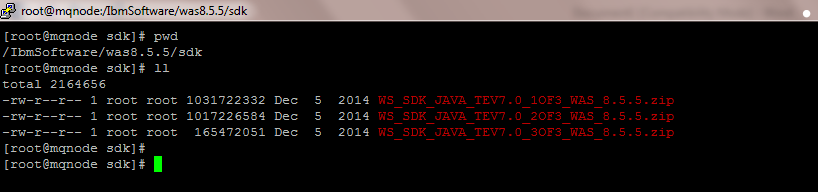
Similarly you can install the SDK 7 Package too

[root@wasnode tools]# ./imcl listAvailablePackages -repositories /IBMSoftware/was8.5_IHS_8.5/was8.5.5/SDK
com.ibm.websphere.IBMJAVA.v70_7.0.4001.20130510_2103
com.ibm.websphere.liberty.IBMJAVA.v70_7.0.4001.20130510_2103
[root@wasnode tools]#
[root@wasnode tools]# ./imcl install com.ibm.websphere.IBMJAVA.v70_7.0.4001.20130510_2103 -repositories /IBMSoftware/was8.5_IHS_8.5/was8.5.5/SDK -installationDirectory /opt/IBM/WebSphere/AppServer -acceptLicense -sP25%                     50%                   75%                100%
——————|——————|——————|——————|
……………………………………………………………………………………………
Installed com.ibm.websphere.IBMJAVA.v70_7.0.4001.20130510_2103 to the /opt/IBM/WebSphere/AppServer directory.

e) List the Installed packages to verify the packages you have installed

[root@wasnode tools]# ./imcl listInstalledPackages
com.ibm.cic.agent_1.6.2000.20130301_2248
com.ibm.websphere.IBMJAVA.v70_7.0.4001.20130510_2103
com.ibm.websphere.ND.v85_8.5.5003.20140730_1249

f) List the directories where the Websphere Packages are installed

[root@wasnode tools]# ./imcl listInstallationDirectories
/opt/IBM/WebSphere/AppServer
[root@wasnode tools]#

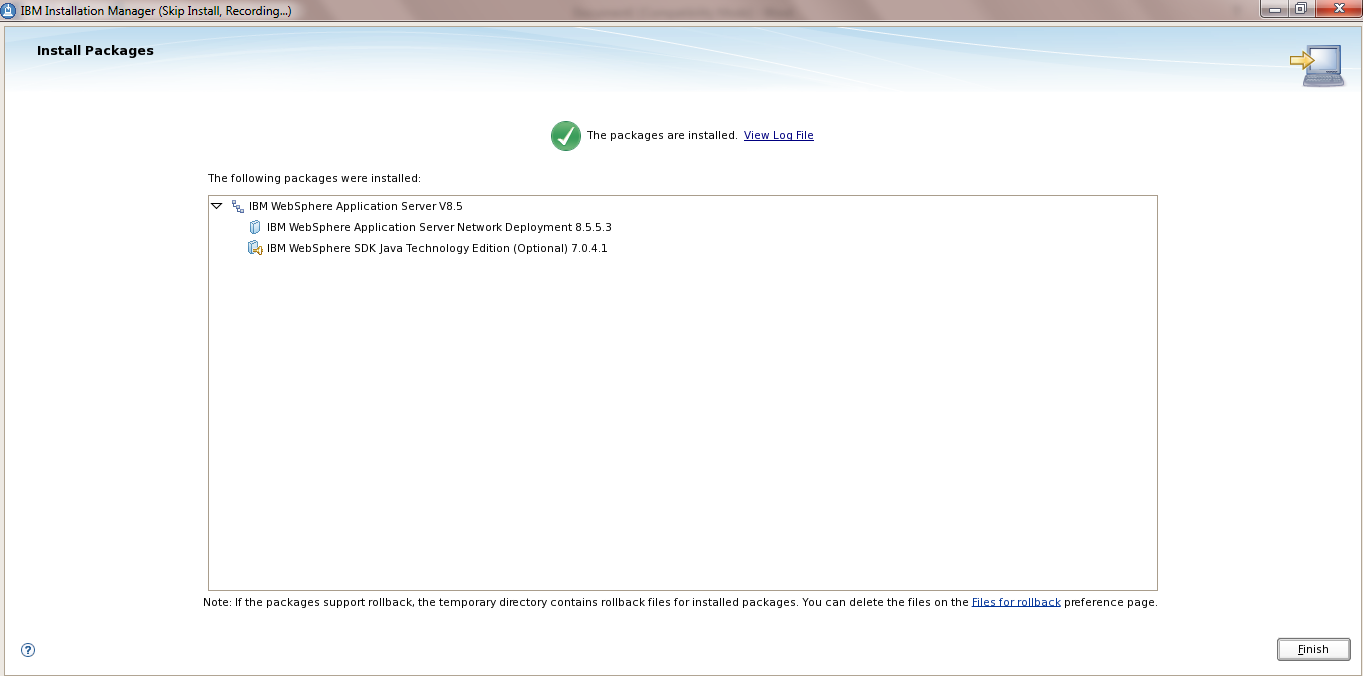
This completes the installation of WAS ND and JAVA SDK 7

=========================================================================
 6: Updation of Websphere ND 8.5.5.1 FIXPACK using imcl command line
Command : ./imcl install

Current Version : WAS ND 8.5.5.0
New Version : WAS ND 8.5.5.1

Procedure
a) Stop All the WAS Processes ( dmgr, Nodeagent , Server ) Also Apply the Fixpack to Dmgr First before applying to other nodes

b) Take the tar backup of the WAS directories, Profiles, IIM, IIM Data ( var/ibm ) etc to revert in case of any issues

c) Check the Current version of the WAS Installation using “./imcl listInstalledPackages”

[root@connections tools]# cd /opt/IBM/InstallationManager/eclipse/tools
[root@connections tools]# ./imcl listInstalledPackages
com.ibm.cic.agent_1.8.2001.20150409_1833
com.ibm.websphere.ND.v85_8.5.5000.20130514_1044

The version is WAS ND 8.5.5.0
Imcl

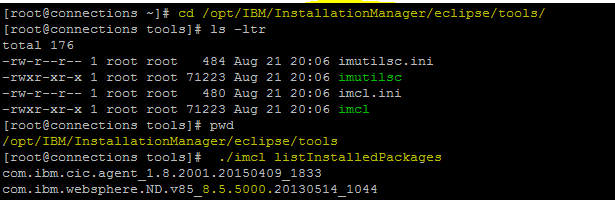
d) Check the Path of the WAS installation using “./imcl listInstallationDirectories”

[root@connections bin]# cd /opt/IBM/InstallationManager/eclipse/tools
[root@connections tools]# ./imcl listInstallationDirectories
/opt/IBM/WebSphere/AppServer

Imcl3

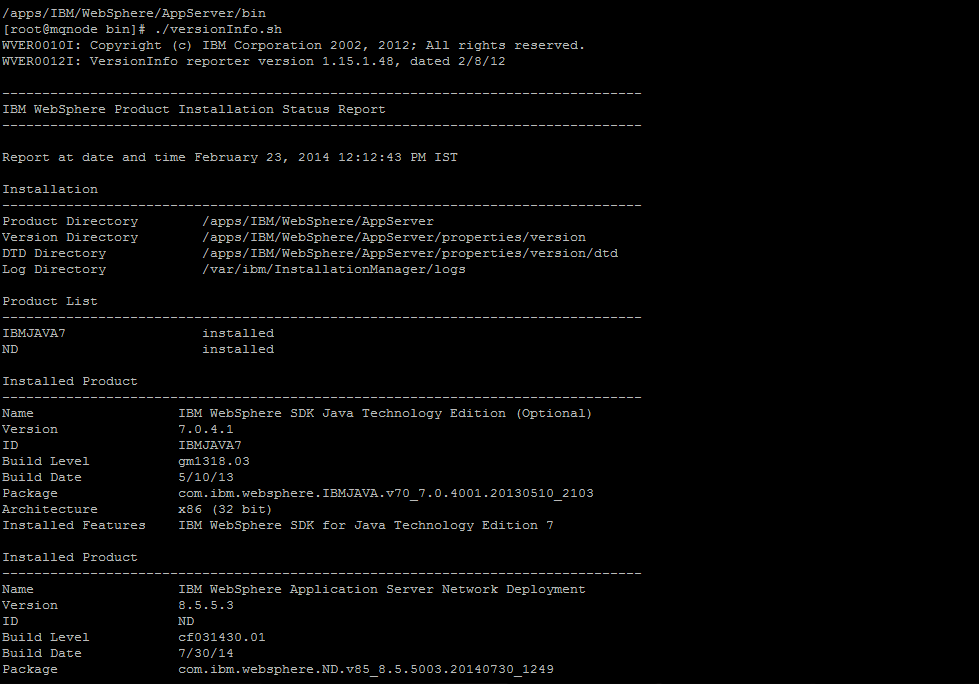
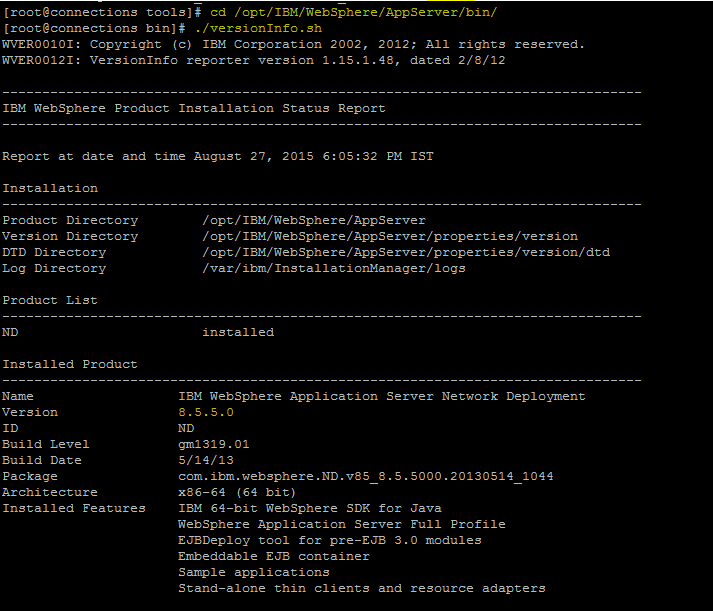
e) Also Check the Version of WAS using “versionInfo.sh”

[root@connections tools]# cd /opt/IBM/WebSphere/AppServer/bin/
[root@connections bin]# ./versionInfo.sh
WVER0010I: Copyright (c) IBM Corporation 2002, 2012; All rights reserved.
WVER0012I: VersionInfo reporter version 1.15.1.48, dated 2/8/12——————————————————————————–
——————————————————————————–
Name IBM WebSphere Application Server Network Deployment
Version 8.5.5.0
ID ND

Imcl2

e) Extract the Fixpack zip 8.5.5-WS-WASND-FP0000001-part1.zip & 8.5.5-WS-WASND-FP0000001-part2.zip in the same Folder .

I have extracted it in /IBMsoftware/Fixpacks/WASND_8.5.5.1FP/

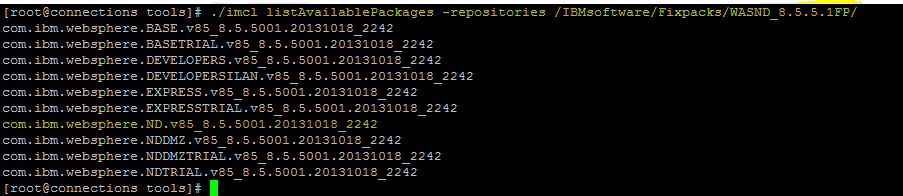
f) List the Available packages in the fixpack Extracted path ie /IBMsoftware/Fixpacks/WASND_8.5.5.1FP/

Command : ./imcl listAvailablePackages -repositories /IBMsoftware/Fixpacks/WASND_8.5.5.1FP/

[root@connections tools]# ./imcl listAvailablePackages -repositories /IBMsoftware/Fixpacks/WASND_8.5.5.1FP/ com.ibm.websphere.BASE.v85_8.5.5001.20131018_2242
…………………..
com.ibm.websphere.ND.v85_8.5.5001.20131018_2242
………………………..
com.ibm.websphere.NDTRIAL.v85_8.5.5001.20131018_2242
[root@connections tools]#
[root@connections tools]#

Here we can see “com.ibm.websphere.ND.v85_8.5.5001.20131018_2242” Package .. We will upgrade this package as we are using websphere.ND.V8.5.5

Imcl5

g) Update the Fixpack using the imcl command
Command: ./imcl install com.ibm.websphere.ND.v85_8.5.5001.20131018_2242 -repositories /IBMsoftware/Fixpacks/WASND_8.5.5.1FP/ -installationDirectory /opt/IBM/WebSphere/AppServer -acceptLicense -sP

[root@connections tools]# ./imcl install com.ibm.websphere.ND.v85_8.5.5001.20131018_2242 -repositories /IBMsoftware/Fixpacks/WASND_8.5.5.1FP/ -installationDirectory /opt/IBM/WebSphere/AppServer -acceptLicense -sP
25%                  50%                     75%                     100%
——————|——————|——————|——————|
…………………………………………:….

Imcl6

h) After the completion of the above command .  check the updated version of WAS , it should be WAS 8.5.5.1 now .
We can see that the package is now “com.ibm.websphere.ND.v85_8.5.5001.20131018_2242″

[root@connections ]# cd /opt/IBM/InstallationManager/eclipse/tools/
[root@connections tools]# ./imcl listInstalledPackages
com.ibm.cic.agent_1.8.2001.20150409_1833
com.ibm.websphere.ND.v85_8.5.5001.20131018_2242
[root@connections tools]#

Imcl7

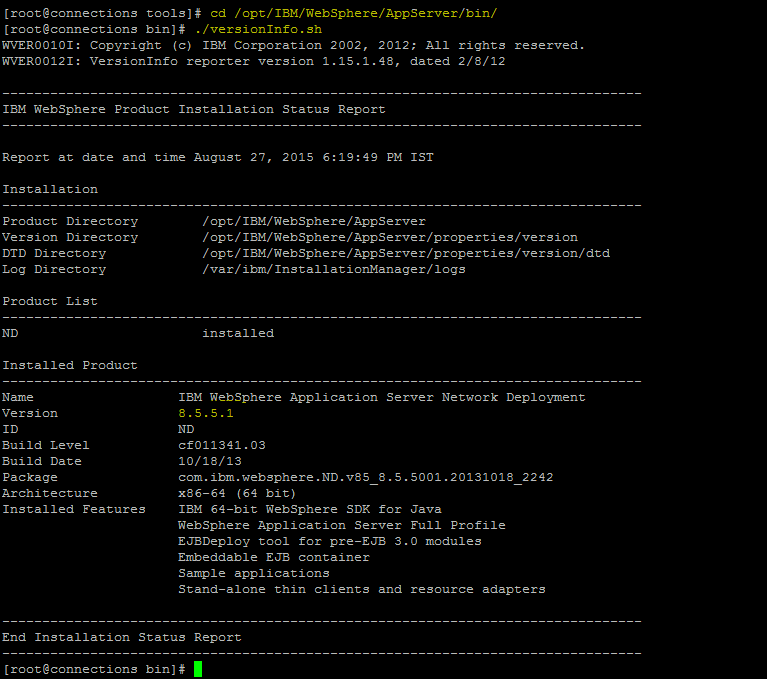
i) Check the versionInfo.sh to see if the Version of the WAS has been updated .

[root@connections tools]# cd /opt/IBM/WebSphere/AppServer/bin/
[root@connections bin]# ./versionInfo.sh
WVER0010I: Copyright (c) IBM Corporation 2002, 2012; All rights reserved.
——————————————————————————–Name IBM WebSphere Application Server Network Deployment
Version 8.5.5.1
ID ND ………….

Imcl8

j) Start the Dmgr, NodeAgent, WAS Servers after the fixpack updation and check the SystemOut.log to see if there are any errors

This is how we can easily update the fixpack using imcl


To get regular mail updates on my Posts..
Please subscribe to the site http://webspherepundit.com
And also like the Facebook Page
https://www.facebook.com/webspherepundit

=========================================================================

Silent Installation of IHS , Plugin and Customization Toolbox 8.5.5 using Response File

Following are the steps for the silent installation

1) Download the necessary packages and the fixpacks from the Passport Advantage
2) Ensure the necessary access is available .. in our case its root ( Though we can install using a non-root user)
3) Create the necessary filesystems ( we will be installing in /opt )
4) Check for sufficient space in the filesystem to extract the zip files and the installation of the Binaries

5) Install the IBM Installation Manager
You can use the Record Function of the Ibm Installation Manager .
Click on the below Link for the Post on Record Function of IIM to create the Response File

Click Here LINK :

6) I have pasted the sample Response File for Installation of IHS , Plugin and Customisation Tool

### SAMPLE RESPONSE FILE FOR IHS, PLUGIN And CUSTOMISATION TOOLBOX ###

<?xml version=”1.0″ encoding=”UTF-8″?>
<!–The “acceptLicense” attribute has been deprecated. Use “-acceptLicense” command line option to accept license agreements.–>
<agent-input acceptLicense=’true’>
<server>
<repository location=’/installers/IBMHTTP8.5.5’/>
<repository location=’/installers/WASSupplements04’/>
</server>
<profile id=’IBM HTTP Server V8.5_MYAPP’ installLocation=’/opt/IBM/HTTPServer‘>
<data key=’eclipseLocation’ value=’/opt/IBM/HTTPServer‘/>
<data key=’user.import.profile’ value=’false’/>
<data key=’cic.selector.os’ value=’linux’/>
<data key=’cic.selector.arch’ value=’x86’/>
<data key=’cic.selector.ws’ value=’gtk’/>
<data key=’user.ihs.allowNonRootSilentInstall’ value=’true’/>
<data key=’user.ihs.http.server.service.name’ value=’none’/>
<data key=’user.ihs.httpPort’ value=’80‘/>
<data key=’user.ihs.installHttpService’ value=’false’/>
<data key=’cic.selector.nl’ value=’en’/>
</profile>
<install modify=’false’>
<offering id=’com.ibm.websphere.IHS.v85′ version=’8.5.5004.20141119_1746′ profile=’IBM HTTP Server V8.5_MYAPP‘ features=’core.feature,arch.64bit’ installFixes=’none’/>
<offering id=’com.ibm.websphere.PLG.v85′ version=’8.5.5004.20141119_1746′ profile=’Web Server Plug-ins for IBM WebSphere Application Server V8.5_MYAPP’ features=’core.feature,com.ibm.jre.6_64bit’ installFixes=’none’/>
<offering id=’com.ibm.websphere.WCT.v85′ version=’8.5.5004.20141119_1746′ profile=’WebSphere Customization Toolbox V8.5_MYAPP’ features=’core.feature,pct’ installFixes=’none’/>
</install>
<profile id=’Web Server Plug-ins for IBM WebSphere Application Server V8.5_MYAPP’ installLocation=’/opt/IBM/Plugins‘>
<data key=’eclipseLocation’ value=’/opt/IBM/Plugins‘/>
<data key=’user.import.profile’ value=’false’/>
<data key=’cic.selector.os’ value=’linux’/>
<data key=’cic.selector.arch’ value=’x86’/>
<data key=’cic.selector.ws’ value=’gtk’/>
<data key=’cic.selector.nl’ value=’en’/>
</profile>
<profile id=’WebSphere Customization Toolbox V8.5_MYAPP’ installLocation=’/opt/IBM/Toolbox‘>
<data key=’eclipseLocation’ value=’/opt/IBM/Toolbox‘/>
<data key=’user.import.profile’ value=’false’/>
<data key=’cic.selector.os’ value=’linux’/>
<data key=’cic.selector.arch’ value=’x86’/>
<data key=’cic.selector.ws’ value=’gtk’/>
<data key=’cic.selector.nl’ value=’en’/>
</profile>
<preference name=’com.ibm.cic.common.core.preferences.eclipseCache’ value=’/opt/IMShared‘/>
<preference name=’com.ibm.cic.common.core.preferences.connectTimeout’ value=’30’/>
<preference name=’com.ibm.cic.common.core.preferences.readTimeout’ value=’45’/>
<preference name=’com.ibm.cic.common.core.preferences.downloadAutoRetryCount’ value=’0’/>
<preference name=’offering.service.repositories.areUsed’ value=’true’/>
<preference name=’com.ibm.cic.common.core.preferences.ssl.nonsecureMode’ value=’false’/>
<preference name=’com.ibm.cic.common.core.preferences.http.disablePreemptiveAuthentication’ value=’false’/>
<preference name=’http.ntlm.auth.kind’ value=’NTLM’/>
<preference name=’http.ntlm.auth.enableIntegrated.win32′ value=’true’/>
<preference name=’com.ibm.cic.common.core.preferences.preserveDownloadedArtifacts’ value=’true’/>
<preference name=’com.ibm.cic.common.core.preferences.keepFetchedFiles’ value=’false’/>
<preference name=’PassportAdvantageIsEnabled’ value=’false’/>
<preference name=’com.ibm.cic.common.core.preferences.searchForUpdates’ value=’false’/>
<preference name=’com.ibm.cic.agent.ui.displayInternalVersion’ value=’false’/>
<preference name=’com.ibm.cic.common.sharedUI.showErrorLog’ value=’true’/>
<preference name=’com.ibm.cic.common.sharedUI.showWarningLog’ value=’true’/>
<preference name=’com.ibm.cic.common.sharedUI.showNoteLog’ value=’true’/>
</agent-input>

### SAMPLE RESPONSE FILE FOR IHS, PLUGIN And CUSTOMISATION TOOLBOX ###

Sample Attachment of the Response File :IHS_Plugins_WCT_8554_Response

7) The Minimal Changes needed to suit your environment

a) Path of the Extracted Binaries and the repository.config files
<repository location=’/installers/IBMHTTP8.5.5‘/>
<repository location=’/installers/WASSupplements04‘/>
<repository location=’/installers/WASSupplements04/WASFP/’/>

b) Installation path of the IHS
<profile id=’IBM HTTP Server V8.5_MYAPP’ installLocation=’/opt/IBM/HTTPServer‘>
<data key=’eclipseLocation’ value=’/opt/IBM/HTTPServer’/>

c) Port changes for IHS
<data key=’user.ihs.httpPort’ value=’80‘/>

d) Plugin Installation Path
<profile id=’Web Server Plug-ins for IBM WebSphere Application Server V8.5_MYAPP’ installLocation=’/opt/IBM/Plugins‘>
<data key=’eclipseLocation’ value=’/opt/IBM/Plugins‘/>

e) Customization Toolbox Installation Path
<profile id=’WebSphere Customization Toolbox V8.5_MYAPP’ installLocation=’/opt/IBM/Toolbox‘>
<data key=’eclipseLocation’ value=’/opt/IBM/Toolbox‘/>

f) IIM Shared location
<preference name=’com.ibm.cic.common.core.preferences.eclipseCache’ value=’/opt/IMShared‘/>


8) Once the response file is ready . Save this response file in the Server at location of your choise
I have kept it in /tmp/IHS_Plugins_WCT_85_Install_Response.xml

Ensure necessary permissions are available for this file execute the imcl command

bash-3.2$ #cd /opt/IBM/InstallationManager/eclipese/tools/
#./imcl input /tmp/IHS_Plugins_WCT_85_Install_Response.xml -acceptLicense -sP

9) Once the installation is completed you can navigate to the folder locations to verify the versions and the Installation Directories of IHS , Plugin and Customization toolBox 8.5


To get regular mail updates on my Posts..
Please subscribe to the site http://webspherepundit.com
And also like the Facebook Page
https://www.facebook.com/webspherepundit


java.lang.OutOfMemoryError: Failed to create a thread: retVal -1073741830, errno 11

I Recently got this issue when starting the App cluster Member for the first time ““java.lang.OutOfMemoryError: Failed to create a thread: retVal -1073741830, errno 11″”

Issue :

a) The Dmgr started properly but when i when tried to start the cluster from the Dmgr for the first time i got this error in the System Out “java.lang.OutOfMemoryError: Failed to create a thread: retVal -1073741830, errno 11”

Error Stack :

Caused by: java.lang.OutOfMemoryError: Failed to create a thread: retVal -1073741830, errno 11
at java.lang.Thread.startImpl(Native Method)
at java.lang.Thread.start(Thread.java:947)
at com.ibm.ws.dcs.vri.common.ThreadManager.getThread(ThreadManager.java:334)
at com.ibm.ws.dcs.vri.common.impl.DCSStackImpl.(DCSStackImpl.java:178)
at com.ibm.ws.dcs.rsmodule.impl.DCSRSStackImpl.(DCSRSStackImpl.java:215)
at com.ibm.ws.dcs.vri.common.impl.DCSCoreStackImpl.(DCSCoreStackImpl.java:79)
at com.ibm.ws.dcs.vri.common.impl.DCSCoreStackImpl.getInstance(DCSCoreStackImpl.java:75)
at com.ibm.ws.dcs.vri.common.impl.DCSStackFactory.getCoreStack(DCSStackFactory.java:92)
… 39 morestyle=”text-align: left;”>[3/12/15 19:31:53:888 IST] 00000001 WsServerImpl E WSVR0009E: Error occurred during startup
com.ibm.ws.exception.RuntimeError: Unable to start the CoordinatorComponentImpl
at com.ibm.ws.hamanager.runtime.CoordinatorComponentImpl.start

(CoordinatorComponentImpl.java:320)
at com.ibm.ws.runtime.component.ContainerHelper.startComponents(ContainerHelper.java:539)
at com.ibm.ws.runtime.component.ContainerImpl.startComponents(ContainerImpl.java:627)
at com.ibm.ws.runtime.component.ContainerImpl.start(ContainerImpl.java:618)
at com.ibm.ws.runtime.component.ServerImpl.start(ServerImpl.java:523)
at com.ibm.ws.runtime.WsServerImpl.bootServerContainer(WsServerImpl.java:311)
at com.ibm.ws.runtime.WsServerImpl.start(WsServerImpl.java:224)
at com.ibm.ws.runtime.WsServerImpl.main(WsServerImpl.java:697)
at com.ibm.ws.runtime.WsServer.main(WsServer.java:59)
at sun.reflect.NativeMethodAccessorImpl.invoke0(Native Method)
at sun.reflect.NativeMethodAccessorImpl.invoke(NativeMethodAccessorImpl.java:60)
at sun.reflect.DelegatingMethodAccessorImpl.invoke(DelegatingMethodAccessorImpl.java:37)
at java.lang.reflect.Method.invoke(Method.java:611)

Steps Tried :

a) Tried to Start the cluster Members using ./startServer.sh server1 but still the error in the SystemOut.log
I felt the heap memory was not sufficient for the JVM increased by 512 MB but still same error 🙂

b) On Revisitng the SystemOutLogs and concluded that it seems to be Native Memory issue error from the Java Stack Error

c) Checked the System Resources like CPU , Memory but they were all fine . Finally i checked the Ulimit
All the Parameters were unlimited except the “Max no of Process” (nproc) which was 1024 .

d) The Value for ulimit nproc was very less than the recommended .
In Linux here is a new configurations (/etc/security/limits.d/90-nproc.conf ) which overrides the nproc setting in the /etc/security/limits.conf
Sample output of /etc/security/limits.d/90-nproc.conf
#* soft nproc 1024

WebSphere instance only uses a few hundred of threads and it will go on increasing depending on the Load and the other instances in the server .
We also have to take into account the other threads which are running on the Machine . So the nproc count may reach if too many threads are opened

Solution:

a) Edit the /etc/security/limits.d/90-nproc.conf to increase the nproc limit for all users .You can also set it for specific user too ..
    NOTE : A reboot is not required for this to take effect, however, the user must be completely logged out of the putty or the session and relogin to take the effect. The next time the user logs back in, the new value will be in place. This can be checked by running ‘ulimit -u’ as the user in question.

b) Update the /etc/security/limits.conf file for the nproc values to 131072 ( or any  higher value )

It is recommended to set the ulimit -u or nproc to a value of 131072 when running on Linux to safely account for all the forked threads within processes that could be created

There are many documents avaliable on the internet for the steps to change the ulimit . please go through them too .

c) After I made those changes to the ulimit & 90-nproc.conf

d) Now i restarted my cluster member and it started without any error now 🙂

NOTE : There could be other reasons though for the “java.lang.OutOfMemoryError: Failed to create a thread: retVal -1073741830, errno 11” .. this is ONE of them 

To get regular mail updates on my Posts..
Please subscribe to the site http://webspherepundit.com
And also like the Facebook Page
https://www.facebook.com/webspherepundit

Create Application Server Profile using Manageprofile.sh

In Most of the customers location there is no GUI access to the server hence will will not be able to create a profile using the Graphical mode

In these cases we will have to use the command line to create the profile
It can be done using manageprofile.sh command in the /bin folder

Create a StandAlone Application Server Profile

Step1: Ensure there is sufficient space in the Profile Path in my case /appprofiles Folder .
Step2: Ensure that the Profile like the profile Name , Node Name , Cell Name , Profile Path is available with you before creation
Step3: List the Profiles
Navigate to /bin Path ie /apps/IBM/WebSphere/AppServer/bin
[root@mqnode bin]#./manageprofiles.sh -listProfiles
[Dmgr}

This indicates all the profile available within the WAS Installation /apps/IBM/WebSphere/
So we already have a profile “Dmgr”

Step4: Use the templatePath /profileTemplates/default for a StandAlone Appserver Profile

Step5: Execute manageprofiles.sh -create

[root@mqnode bin]#cd /apps/IBM/WebSphere/AppServer/bin
[root@mqnode bin]# ./manageprofiles.sh -create –profileName MYPROFILE –profilePath /appprofiles/MYPROFILE –templatePath /apps/IBM/WebSphere/AppServer/profileTemplates/default –serverName TEST_SERVER  –nodeName MYPROFILENode1 –hostName mqnode.test.com –enableAdminSecurity true –adminUserName wasadmin –adminPassword wasadmin@12
INSTCONFSUCCESS: Success: Profile MYPROFILE now exists. Please consult /appprofiles/MYPROFILE/logs/AboutThisProfile.txt for more information about this profile.

Ensure We get “INSTCONFSUCCESS” Success output . It will indicate the profile was created successfully

websphere, manageprofile.sh , Profile, StandAlone Profile

Capture1

NOTE : There are many options for manageprofile.sh like startingPort etc ..

Step6: We also need to Check the ProfileCreation logs to validate and check for any errors
a) Check the Profile Path ie /appprofiles/MYPROFILE to see if the Folder exists and the folder structure created under it
b) Navigate to /apps/IBM/WebSphere/AppServer/logs/manageprofiles/
tail -f <ProfileName>_create.log

ie [root@mqnode bin]#tail -f MYPROFILE_create.log 

Capture3
NOTE : If the profile creation fails , this logs will give the reasons for the failure

[root@mqnode bin]# cat /appprofiles/MYPROFILE/logs/AboutThisProfile.txt

Capture2

Step7: Start The Server
Capture5


Step8: Login to the Admin Console using the credentials provided while creating the profile ie wasadmin/wasadmin@12
Ports can be viewed from the AboutThisProfile.txt file

[root@mqnode bin]# cat /appprofiles/MYPROFILE/logs/AboutThisProfile.txt
Enable administrative security (recommended): True
Administrative console port: 9060
Administrative console secure port: 9043

Capture7

Capture8

Step9 : If needed change the Ownership of the Profile folder to the WAS Application Owner
you can use [root@mqnode bin]#chown -R wasuser:wasuser /appprofiles/MYPROFILE

With this we have created a StandAlone Application Server Profile


To get regular mail updates on my Posts ,  Please subscribe to the site http://webspherepundit.com and also like the Facebook Pagehttps://www.facebook.com/webspherepundit


Record Mode of IBM Installation Manager

There are many times when you want to to use the Silent Installation for WAS , IHS , Plugin or any other Products which uses Installation Manager

We can use the Record Function in the IBM Installation Manager to create the XML response files on the Test Machine or ur Desktop where you have IIM installed and then use these XML files on the Intended Server where you want to install the Websphere Products

We can also directly run the record function on the Intended serve if we have the GUI Enabled to launch the IIM

Steps as follows

Record mode of Ibm Installation Manager is used to generate the response.xml files which can be used to install/uninstall and upgrade the Websphere Installation 

It works on all the products which can be installed using IIM

a) Install the IBM Installation Manager on the server
b) Navigate to the tools folder of IIM
             cd <IIM Install Home/eclipse/tools
c) Generating the response.xml files using the record function of IIM
In This example we will create a response file for Websphere Application Server 8.5 Installation

Execute #./IBMIM –record /apps/WAS8.8.8_Install.xml –skipInstall /tmp/was8.5.5

Where

-record : ensures we are using the record function
/apps/WAS8.8.8_Install.xml : is the response file which will be created ( any file name can be used)
-skipInstall : This is to skip the installation and only create the response
/tmp/was8.5.5 : is a temp location where the Installation Manager will extract the files ( this can be any location )

silentwas8.517

This will launch the Installation Manager in Skip Install Recording mode (Highlighted in Yellow)

silentwas8.518

b) Add the repositories needed for WAS 8.5.5 install
c) We will be installing the fixpack also together along with the base install

silentwas8.519

Select the repository.config for was8.5.5

silentwas8.520

Similarly do it for the repository.config for SDK folder and the fixpack 3

silentwas8.521

Click OK

c) Then Click Install to launch the installer function

silentwas8.522

This will display the packages for the installation ( We wil deselect the SDK for Liberty profile as its not needed for now)

silentwas8.523

e) Accept the License

silentwas8.524

f) Provide the path of the Shared Repository Directory ..

I gave it /apps/IMShared as I want all the installation binaries in /apps

silentwas8.525

g) Provide the path where you want the WAS8.5.5.3 to be installed

silentwas8.526

h) Select the options needed

silentwas8.527

Summary screen is displayed. Click Install
Here you can observe that the IBM WAS version is provided 8.5.5.3
IM has automatically detected the Fixpack also added in the repository

silentwas8.528

Click Finsh .

i) A file /apps/WAS8.8.8_Install.xml which is the response file for WAS8.5.5.3 Installation

silentwas8.529

Response file

silentwas8.530

Open the file /apps/WAS8.8.8_Install.xml
Some observation :
We can see the repository location for the packages
“/ibmSoftware…….”

j) Modify the installLocation as per your needs
Change the Profile id as required .. though not necessary unless you allready have an installation of was with the same profile id
Eg “ IBM WebSphere Application Server V8.5 MY SERVER”

Verify that the files once again for any typo error and save it

silentwas8.531

k) Execute the imcl to install the WAS


[root@mqnode was8.5.5]# /apps/InstallationManager/eclipse/tools/imcl input /apps/WAS8.5.5_Install.xml -acceptLicense -sP

silentwas8.532

After few minutes if all is well then it will give the output that WAS 8.5.5.3 is installed

silentwas8.533

l) Verify the Installation

silentwas8.534

m) Check the version using ./versionInfo.sh

silentwas8.535

Here we can see WAS ND 8.5.5.3 is installled at /apps/IBM location

NOTE:This response file can be used to install similar was8.5.5.3 on different machines

Also using the record function any Installation response file can be created ie for IHS , BPM8, Websphere Portal 8 etc .


Silent Installation of Installation Manager

Silent Installation of Installation Manager 1.6

a) Unzip the Installation Manager setup  agent.installer.linux.gtk.x86_1.6.0.20120831_1216.zip

silentwas8.53

#unzip agent.installer.linux.gtk.x86_1.6.0.20120831_1216.zip

silentwas8.54

The extracted folder

silentwas8.55

Edit install.xml to define the location for IM installation
         b)    #vi install.xml

Add the below entries in the install.xml file

<profile kind=’self’ installLocation=’/apps/InstallationManager/eclipse’ id=’IBM Installation Manager’>
</profile>

Highlighted the entries in yellow where “/apps/InstallationManager/eclipse” is the location where I need to install the Installation Manager

silentwas8.56

         c)  Install IM1.6 silently
Execute #./installc –acceptLicense

This command reads the install.xml file and installed  it in the location mentioned in it

silentwas8.57

Once the installation is completed the message “Installed <package> to the <location> directory is displayed

             d) Verify the installation and the versions of Installation Manager

Navigate to /apps/InstallationManager/ folder

silentwas8.58


silentwas8.59


             Execute ./imcl -version to check the version of IM fron /apps/InstallationManager/eclipese/tools/

       THIS IS HOW WE INSTALL INSTALLATION MANAGER SILENTLY 


Silent Installation of Websphere Application Server 8.5.5 on Linux

Steps as follows

1) Download the necessary packages and the fixpacks from the Passport Advantage
2) Ensure the necessary access is available .. in our case its root ( Though we can install using a non-root user)
3) Create the necessary filesystems ( we will be installing in /apps )
4) Check for sufficient space in the filesystem to extract the zip files and the installation

Below are the files which we have downloaded and transferred in the server

Installation Manager 1.6
agent.installer.linux.gtk.x86_1.6.0.20120831_1216.zip

WAS ND Fixpack 8.5.5.3
8.5.5-WS-WAS-FP0000003-part1.zip
8.5.5-WS-WAS-FP0000003-part2.zip

WASND 8.5.5 SDK
WS_SDK_JAVA_TEV7.0_1OF3_WAS_8.5.5.zip
WS_SDK_JAVA_TEV7.0_2OF3_WAS_8.5.5.zip
WS_SDK_JAVA_TEV7.0_3OF3_WAS_8.5.5.zip

WASND 8.5.5
WASND_v8.5.5_1of3.zip
WASND_v8.5.5_2of3.zip
WASND_v8.5.5_3of3.zip

I have created few folders within /IbmSoftware/was8.5.5/ and saved the corresponding files in these folders


silentwas8.5

PATH
/IbmSoftware/was8.5.5/IM1.6
agent.installer.linux.gtk.x86_1.6.0.20120831_1216.zip
/IbmSoftware/was8.5.5/was8.5.5
WASND_v8.5.5_1of3.zip
WASND_v8.5.5_2of3.zip
WASND_v8.5.5_3of3.zip
/IbmSoftware/was8.5.5/sdk
WS_SDK_JAVA_TEV7.0_1OF3_WAS_8.5.5.zip
WS_SDK_JAVA_TEV7.0_2OF3_WAS_8.5.5.zip
WS_SDK_JAVA_TEV7.0_3OF3_WAS_8.5.5.zip
/IbmSoftware/was8.5.5/fixpack
8.5.5-WS-WAS-FP0000003-part1.zip
8.5.5-WS-WAS-FP0000003-part2.zip

For eg as below image

silentwas8.51

silentwas8.52

5)Installation of Installation Manager

a) Unzip the Installation Manager setup  agent.installer.linux.gtk.x86_1.6.0.20120831_1216.zip

silentwas8.53

#unzip agent.installer.linux.gtk.x86_1.6.0.20120831_1216.zip

silentwas8.54

The extracted folder

silentwas8.55

Edit install.xml to define the location for IM installation
         b)    #vi install.xml

Add the below entries in the install.xml file

<profile kind=’self’ installLocation=’/apps/InstallationManager/eclipse’ id=’IBM Installation Manager’>
</profile>

Highlighted the entries in yellow where “/apps/InstallationManager/eclipse” is the location where I need to install the Installation Manager

silentwas8.56

         c)  Install IM1.6 silently
Execute #./installc –acceptLicense

This command reads the install.xml file and installed  it in the location mentioned in it

silentwas8.57

Once the installation is completed the message “Installed <package> to the <location> directory is displayed

             d) Verify the installation and the versions of Installation Manager

Navigate to /apps/InstallationManager/ folder

silentwas8.58


silentwas8.59


             Execute ./imcl -version to check the version of IM fron /apps/InstallationManager/eclipese/tools/

       THIS IS HOW WE INSTALL INSTALLATION MANAGER SILENTLY 


6)  CREATING THE Response xml files


a)  Launching Xming to display the graphical interface of the commands
Note : you can use any other X11 utility for unix but I prefer Xming

============================================================================

CONFIGURING XMING 

============================================================================

1)    Download Xming and install it on ur local machine from where you want to connect
2)    Execute the XLaunch icon
3)    Select Multiple Windows and “Next”

silentwas8.510

Select “Start no Client”

silentwas8.511

Select “No Access Control”

silentwas8.512

Click on Finish

silentwas8.513

Lauch Putty
And expand the Putty Settings > Connections >> SSH >> X11
Enable “X11 Forwarding” and mention localhost:0
Now put the ip and login

silentwas8.514

Once logged in enter “w” to determine the ip you are connecting to the WAS server with .. Here its 10.0.0.2

silentwas8.515

Export the display variable using
#export=DISPLAY=10.0.0.2:0.0

Run xclock to check if it works

silentwas8.516

This confirms that ths X11 forwarding works

7) Generating the response.xml files 

a) Generating the response.xml files using the record funciton of IM

    Execute #./IBMIM –record /apps/WAS8.8.8_Install.xml –skipInstall /tmp/was8.5.5

Where

-record  : ensures we are using the record function
/apps/WAS8.8.8_Install.xml  : is the response file which will be created ( any file name can be used)
-skipInstall  : This is to skip the installation and only create the response
/tmp/was8.5.5 : is a temp location where the Installation Manager will extract the files ( this can be any location )

silentwas8.517

This will launch the Installation Manager in Skip Install Recording mode (Highlighted in Yellow)

silentwas8.518

b) Add the repositories needed for WAS 8.5.5 install
c) We will be installing the fixpack also together along with the base install

silentwas8.519

Select the repository.config for was8.5.5

silentwas8.520

Similarly do it for the repository.config for SDK folder and the fixpack 3

silentwas8.521

Click OK

           c) Then Click Install to launch the installer function

silentwas8.522

This will display the packages for the installation ( We wil deselect the SDK for Liberty profile as its not needed for now)

silentwas8.523

           e)  Accept the License

silentwas8.524

         f)  Provide the path of the Shared Repository Directory ..

I gave it /apps/IMShared as I want all the installation binaries in /apps

silentwas8.525

           g) Provide the path where you want the WAS8.5.5.3 to be installed

silentwas8.526

              h) Select the options needed

silentwas8.527

Summary screen is displayed. Click Install
Here you can observe that the IBM WAS version is provided 8.5.5.3
IM has automatically detected the Fixpack also added in the repository

silentwas8.528

Click Finsh .

          i) A file /apps/WAS8.8.8_Install.xml which is the response file for WAS8.5.5.3 Installation

silentwas8.529

Response file

silentwas8.530

Open the file /apps/WAS8.8.8_Install.xml
Some observation :
We can see the repository location for the packages
“/ibmSoftware…….”

j) Modify the installLocation as per your needs
Change the Profile id as required .. though not necessary unless you allready have an installation of was with the same profile id
Eg “ IBM WebSphere Application Server V8.5 MY SERVER”

Verify that the files once again for any typo error and save it

silentwas8.531

       k) Execute the imcl to install the WAS


[root@mqnode was8.5.5]# /apps/InstallationManager/eclipse/tools/imcl input /apps/WAS8.5.5_Install.xml -acceptLicense -sP

silentwas8.532

After few minutes if all is well then it will give the output that WAS 8.5.5.3 is installed

silentwas8.533

       l) Verify the Installation

silentwas8.534

        m) Check the version using ./versionInfo.sh

silentwas8.535

Here we can see WAS ND 8.5.5.3 is installled at /apps/IBM location

NOTE:This response file can be used to install similar was8.5.5.3 on different machines

Also using the record function any Installation response file can be created ie for IHS , BPM8, Websphere Portal 8 etc .


Configuring Standalone custom registry in WAS

File-based repository Creation and configuration

Security is paramount for the Websphere Application server Environment
Global Security
a) Global security is enabled to secure your WAS server, but it requires a user registry.
b) A user registry contains the user and group names for authentication and authorization purposes.
c) When we configure it , the  application server will connect to the registry and perform lookups to acquire user credentials used in areas where authorization is required.

There are four types of registry
Standalone custom registry :
Standalone custom registry Allows a custom registry that is essentially based on Java
code implementation.

Local operating system :
Local operating system Specified the registry for the local OS.

Standalone LDAP registry :
Standalone LDAP registry Only used LDAP defined users and groups and required

Federated repositories :
Federated repositories Manages users and groups across multiple repositories
using a virtual realm. The registries can also be made up
of the combinations of the other registry types.
File-based repository Creation and configuration
Step 1 : Create the  user registry property  file
This file will have the users with the password and the details of the user like userid and group id
a) Create a folder called <was_root>/fileRegistry on our Linux box
b) Create a file called user.props with contents placed below

# Format:
# name:passwd:uid:gids:display name
# where name = userId/userName of the user
# passwd = password of the user
# uid = uniqueId of the user
# gid = groupIds of the groups that the user belongs to
# display name = a (optional) display name for the user.
wasadmin:wasadmin:101:101:WebSphere Administrator

Step 2 : Create the Group registry property file
a) In the folder <was_root>/fileRegistry create a file called groups.props and the contents of the file
will be as follows:
# Format:
# name:gid:users:display name
# where name = groupId of the group
# gid = uniqueId of the group
# users = list of all the userIds that the group contains
# display name = a (optional) display name for the group.
admins:101:wasadmin:Administrative group

NOTE: Ensure that any new files you create are assigned appropriate rights using chmod and chown to ensure WebSphere processes can read the file.
NOTE : Add additional users like wasmon , wasops etc on these user.props  and  groups.props files

Step 3: Turning on global security
To turn on global security,
a)    Log in to the Admin console
b)    Navigate to the Security
c)    Click Global security, as shown in following screenshot

filebasedsec

filebasedsec1


Step 4: Security Configuration Wizard
WebSphere has  a wizard to set up basic security using an internal repository.

Click the Security Configuration Wizard button as shown in the previous
screenshot.

Step 5: Standalone custom registry
a)    Start by selecting Standalone custom registry during our use of the Global security
wizard, as shown in the following screenshot:

filebasedsec2

Step 6: The Configure standalone custom registry page,

a) Type wasadmin in the Primary administrative user name and add two properties.
b) The usersFile property will point to the users.props file
c) The groupsFile property will point to the location of the groups.props file

filebasedsec3

Step 7 : Custom registry class name
Custom registry class name  is already filled in with a Java class that exists in the
internals of WebSphere that contains the code for WebSphere to use the user.props
and groups.props files.

Step 8: Complete the Configurations
Click Next to view the summary, and then click Finish to complete your file-based repository.

Step 9 : Restart the Websphere Server

         a)    Stop Application Server
<was_profile_root>/bin/stopServer.sh server1
b)    Start Application Server
<was_profile_root>/bin/startServer.sh server1

Step 10: Login to the Admin console
Once global security is enabled, log in to the standard login URL
http:Hostname:9060/ibm/console

filebasedsec4

You are being redirected to a secure site and a warning that you have received a Secure Sockets Layer (SSL) certificate from an unknown Certificate Authority (CA) will be shown in the browser.

Type wasadmin for the username and wasadmin for the password and click Log in
to gain access to the administrative console.

THIS IS HOW WE WILL CONFIGURE THE FILE BASED REPOSITORY

Silent Installation of Websphere Application Server 8.5 on Linux

Below are the highlevel steps to install Websphere application server 8.5 ( you can customize it based on your requirement)
OS : Red Hat Enterprise Linux

Step1 : Download WAS 8.5 multiple platform from passport Advantage or use the media


Step 2: Unpack the images
Ensure there is sufficient space in the filesystem where you are extracting
You can use $df -h  command to check the filesystem usage

         a) For IBM Installation Manager
$ mkdir /tmp/IIM
$ cd /tmp/IIM
$ unzip /mnt/was/Software/WAS85/InstalMgr1.5.2_LNX_X86_WAS_8.5.zip

b) WAS 8.5 ( including ND, Supplements and SDK )

$ mkdir /tmp/WAS85
$ cd /tmp/WAS85
$ unzip /mnt/was/Software/WAS85/WAS_ND_V8.5_1_OF_3.zip
$ unzip /mnt/was/Software/WAS85/WAS_ND_V8.5_2_OF_3.zip
$ unzip /mnt/was/Software/WAS85/WAS_ND_V8.5_3_OF_3.zip

Here I have extracted the 3 zip files for WAS ND


Step 3:  Set up the hard and soft file limits

$ vi /etc/security/limits.conf

Append: –
*      soft     nofile          65535
*      hard    nofile          65535

This may vary based on the OS . Refer the infocenter for more details


Step 4:  Check the OS pre-requisites

a ) Refer the infocenter for more details
b ) The Installation manager would required the pre-requisite Linux libraries and RPMs.


Step 5: Install IBM Installation Manager (IIM)

$ cd /tmp/IIM/
$ ./installc -acceptLicense -nosplash

This will install IIM using the console option


Step 6:  Check IIM version

$ /opt/IBM/InstallationManager/eclipse/IBMIM -version -silent -nosplash
Installation Manager (installed)
Version: 1.5.2
Internal Version: 1.5.2000.20120223_0907


Step 7:  Record the Response File

$ /opt/IBM/InstallationManager/eclipse/IBMIM -record ~/install_WAS85.rsp -skipInstall /tmp

NOTE:  I added the currently available set of WAS 8.5 iFixes: –

-rwxr-xr-x 1 501 games  205117 Oct  3 13:20 8.5.0.0-ws-was-ifpm62795.zip
-rwxr-xr-x 1 501 games  304065 Oct  3 13:20 8.5.0.0-ws-was-ifpm63690.zip
-rwxr-xr-x 1 501 games  251862 Oct  3 13:20 8.5.0.0-ws-was-ifpm63827.zip
-rw-r–r– 1 501 games  300831 Oct  3 13:20 8.5.0.0-ws-was-ifpm71296.zip
-rw-r–r– 1 501 games 1561566 Oct  3 13:20 8.5.0.0-ws-wasihs-multios-ifpm72915.zip
-rwxr-xr-x 1 501 games 2252798 Oct  3 13:20 8.5.0.0-ws-wasnd-distexceptibmi-ifpm64890.zip
-rw-r–r– 1 501 games  437441 Oct  3 13:20 8.5.0.0-ws-wasnd-distexceptibmi-ifpm66137.zip
-rwxr-xr-x 1 501 games  227880 Oct  3 13:20 8.5.0.0-ws-wasprod-ifpm64186.zip
-rwxr-xr-x 1 501 games  235550 Oct  3 13:20 8.5.0.0-ws-wasprod-multios-ifpm63479.zip

and that the code was located in /tmp/WAS85 and the iFixes were located in /tmp/WAS85/Fixes.

which results in: –
=================install_WAS85.rsp=======================================
<?xml version=”1.0″ encoding=”UTF-8″?>
<!–The “acceptLicense” attribute has been deprecated. Use “-acceptLicense” command line option to accept license agreements.–>
<agent-input acceptLicense=’true’>
<server>
<repository location=’/tmp/WAS85’/>
<repository location=’/tmp/WAS85/Fixes/8.5.0.0-ws-was-ifpm62795.zip’/>
<repository location=’/tmp/WAS85/Fixes/8.5.0.0-ws-was-ifpm63690.zip’/>
<repository location=’/tmp/WAS85/Fixes/8.5.0.0-ws-was-ifpm63827.zip’/>
<repository location=’/tmp/WAS85/Fixes/8.5.0.0-ws-was-ifpm71296.zip’/>
<repository location=’/tmp/WAS85/Fixes/8.5.0.0-ws-wasihs-multios-ifpm72915.zip’/>
<repository location=’/tmp/WAS85/Fixes/8.5.0.0-ws-wasnd-distexceptibmi-ifpm64890.zip’/>
<repository location=’/tmp/WAS85/Fixes/8.5.0.0-ws-wasnd-distexceptibmi-ifpm66137.zip’/>
<repository location=’/tmp/WAS85/Fixes/8.5.0.0-ws-wasprod-ifpm64186.zip’/>
<repository location=’/tmp/WAS85/Fixes/8.5.0.0-ws-wasprod-multios-ifpm63479.zip’/>
</server>
<profile id=’IBM WebSphere Application Server V8.5′ installLocation=’/opt/IBM/WebSphere/AppServer‘>
<data key=’eclipseLocation’ value=’/opt/IBM/WebSphere/AppServer‘/>
<data key=’user.import.profile’ value=’false’/>
<data key=’cic.selector.os’ value=’linux’/>
<data key=’cic.selector.arch’ value=’x86’/>
<data key=’cic.selector.ws’ value=’gtk’/>
<data key=’cic.selector.nl’ value=’en’/>
</profile>
<install modify=’false’>
<offering id=’8.5.0.0-WS-WAS-IFPM62795′ version=’8.5.0.20120503_1150′ profile=’IBM WebSphere Application Server V8.5′ features=’-‘/>
<offering id=’8.5.0.0-WS-WAS-IFPM63690′ version=’8.5.0.20120611_1318′ profile=’IBM WebSphere Application Server V8.5′ features=’-‘/>
<offering id=’8.5.0.0-WS-WAS-IFPM63827′ version=’8.5.0.20120503_1507′ profile=’IBM WebSphere Application Server V8.5′ features=’-‘/>
<offering id=’8.5.0.0-WS-WASND-DistExceptIBMi-IFPM64890′ version=’8.5.0.20120608_1634′ profile=’IBM WebSphere Application Server V8.5′ features=’-‘/>
<offering id=’8.5.0.0-WS-WASND-DistExceptIBMi-IFPM66137′ version=’8.5.0.20120615_0733′ profile=’IBM WebSphere Application Server V8.5′ features=’-‘/>
<offering id=’8.5.0.0-WS-WASProd-IFPM64186′ version=’8.5.0.20120611_1543′ profile=’IBM WebSphere Application Server V8.5′ features=’-‘/>
<offering id=’8.5.0.0-WS-WASProd-MultiOS-IFPM63479′ version=’8.5.0.20120613_2056′ profile=’IBM WebSphere Application Server V8.5′ features=’-‘/>
<offering id=’com.ibm.websphere.ND.v85′ version=’8.5.0.20120501_1108′ profile=’IBM WebSphere Application Server V8.5′ features=’core.feature,ejbdeploy,thinclient,embeddablecontainer,com.ibm.sdk.6_64bit,samples,liberty’ installFixes=’none’/>
</install>
<preference name=’com.ibm.cic.common.core.preferences.eclipseCache’ value=’/opt/IBM/IMShared‘/>
<preference name=’com.ibm.cic.common.core.preferences.connectTimeout’ value=’30’/>
<preference name=’com.ibm.cic.common.core.preferences.readTimeout’ value=’45’/>
<preference name=’com.ibm.cic.common.core.preferences.downloadAutoRetryCount’ value=’0’/>
<preference name=’offering.service.repositories.areUsed’ value=’true’/>
<preference name=’com.ibm.cic.common.core.preferences.ssl.nonsecureMode’ value=’false’/>
<preference name=’com.ibm.cic.common.core.preferences.http.disablePreemptiveAuthentication’ value=’false’/>
<preference name=’http.ntlm.auth.kind’ value=’NTLM’/>
<preference name=’http.ntlm.auth.enableIntegrated.win32′ value=’true’/>
<preference name=’com.ibm.cic.common.core.preferences.preserveDownloadedArtifacts’ value=’true’/>
<preference name=’com.ibm.cic.common.core.preferences.keepFetchedFiles’ value=’false’/>
<preference name=’PassportAdvantageIsEnabled’ value=’false’/>
<preference name=’com.ibm.cic.common.core.preferences.searchForUpdates’ value=’false’/>
<preference name=’com.ibm.cic.agent.ui.displayInternalVersion’ value=’false’/>
<preference name=’com.ibm.cic.common.sharedUI.showErrorLog’ value=’true’/>
<preference name=’com.ibm.cic.common.sharedUI.showWarningLog’ value=’true’/>
<preference name=’com.ibm.cic.common.sharedUI.showNoteLog’ value=’true’/>
</agent-input>

=================install_WAS85.rsp=======================================

This results in creating the above response file in the path mentioned.

NOTE: If you want to change the Installation to alternative path we can change the installLocation and eclipseLocation

—Before rsp File —————–
<profile id=’IBM WebSphere Application Server V8.5′ installLocation=’/opt/IBM/WebSphere/AppServer‘>
<data key=’eclipseLocation’ value=’/opt/IBM/WebSphere/AppServer‘/>
<preference name=’com.ibm.cic.common.core.preferences.eclipseCache’ value=’/opt/IBM/IMShared‘/>
—Before rsp File —————–

For Eg :
a) WAS to be installed in /apps/WAS85 instead of /opt/IBM/WebSphere/AppServer
b) Shared location from /opt/IBM/IMShared to /apps/IMShared

—After Changes rsp File —————–
<profile id=’IBM WebSphere Application Server V8.5′ installLocation=’/apps/WAS85‘>
<data key=’eclipseLocation’ value=’/apps/WAS85‘/>
<preference name=’com.ibm.cic.common.core.preferences.eclipseCache’ value=’/apps/IMShared‘/>
—After Changes rsp File —————–


Step 8: Perform the installation

$ /opt/IBM/InstallationManager/eclipse/IBMIM -input ~/install_WAS85.rsp -log install_WAS85.log -silent -nosplash -acceptLicense

After some time you will see the result as

Installed 8.5.0.0-WS-WAS-IFPM62795_8.5.0.20120503_1150 to the /opt/IBM/WebSphere/AppServer directory.
Installed 8.5.0.0-WS-WAS-IFPM63690_8.5.0.20120611_1318 to the /opt/IBM/WebSphere/AppServer directory.
Installed 8.5.0.0-WS-WAS-IFPM63827_8.5.0.20120503_1507 to the /opt/IBM/WebSphere/AppServer directory.
Installed 8.5.0.0-WS-WASND-DistExceptIBMi-IFPM64890_8.5.0.20120608_1634 to the /opt/IBM/WebSphere/AppServer directory.
Installed 8.5.0.0-WS-WASND-DistExceptIBMi-IFPM66137_8.5.0.20120615_0733 to the /opt/IBM/WebSphere/AppServer directory.
Installed 8.5.0.0-WS-WASProd-IFPM64186_8.5.0.20120611_1543 to the /opt/IBM/WebSphere/AppServer directory.
Installed 8.5.0.0-WS-WASProd-MultiOS-IFPM63479_8.5.0.20120613_2056 to the /opt/IBM/WebSphere/AppServer directory.
Installed com.ibm.websphere.ND.v85_8.5.0.20120501_1108 to the /opt/IBM/WebSphere/AppServer directory.


Step 9:  Validate the installation

$ /opt/IBM/WebSphere/AppServer/bin/versionInfo.sh

WVER0010I: Copyright (c) IBM Corporation 2002, 2012; All rights reserved.
WVER0012I: VersionInfo reporter version 1.15.1.48, dated 2/8/12

——————————————————————————–
IBM WebSphere Product Installation Status Report
——————————————————————————–

Report at date and time October 3, 2012 3:16:37 PM BST

Installation
——————————————————————————–
Product Directory        /opt/IBM/WebSphere/AppServer
Version Directory        /opt/IBM/WebSphere/AppServer/properties/version
DTD Directory            /opt/IBM/WebSphere/AppServer/properties/version/dtd
Log Directory            /var/ibm/InstallationManager/logs

Product List
——————————————————————————–
ND                       installed

Installed Product
——————————————————————————–
Name                  IBM WebSphere Application Server Network Deployment
Version               8.5.0.0
ID                    ND
Build Level           gm1218.01
Build Date            5/1/12
Package               com.ibm.websphere.ND.v85_8.5.0.20120501_1108
Architecture          x86-64 (64 bit)
Installed Features    IBM 64-bit WebSphere SDK for Java
WebSphere Application Server Full Profile
EJBDeploy tool for pre-EJB 3.0 modules
Embeddable EJB container
WebSphere Application Server Liberty Profile
Sample applications
Stand-alone thin clients and resource adapters

——————————————————————————–
End Installation Status Report
——————————————————————————–

b) You can  also check the folders to ensure that the files are created in the location /opt/IBM/WebSphere/AppServer


Step 10: You can create the profiles now as required using PMT or manageprofile.sh

NOTE : you can use the similar steps to silently Install Websphere 8.0 also