MQ Triggering
WebSphere MQ provides a feature that enables an application or channel to be started automatically when there are messages available to retrieve from a queue
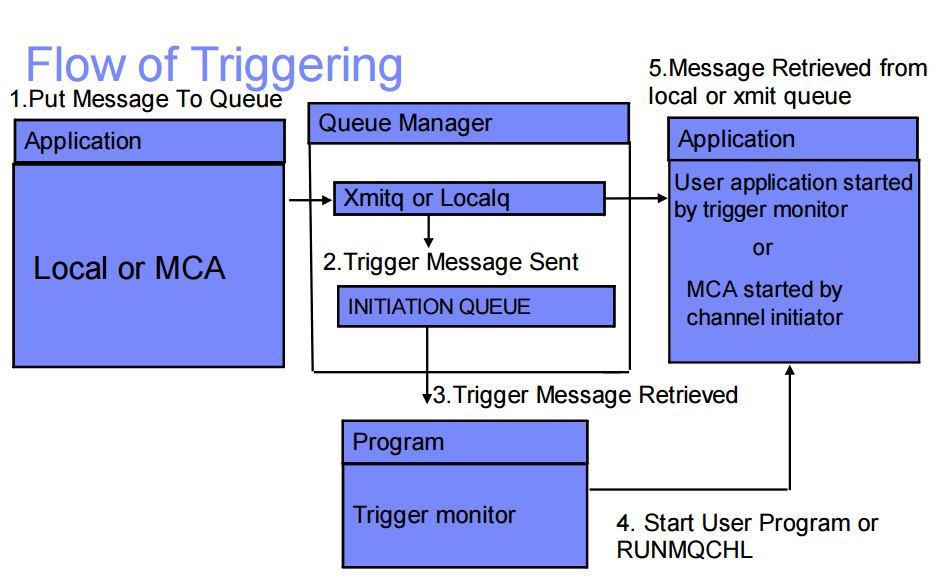
1) A message is put to a queue defined as triggered.
2) If a series of conditions are met, the queue manager sends a trigger message to an initiation queue.
3) This is called a trigger event.
4) A trigger monitor reads the trigger message and takes the appropriate action based on the contents of the message, which is typically to start a program to process the triggered queue.
5) Trigger monitors may be built-in or user defined
Some links for more elaborate details on triggering
https://hursleyonwmq.wordpress.com/2007/02/09/triggering-checklist/
http://blog.niklasottosson.com/?p=598
http://www-01.ibm.com/support/docview.wss?uid=swg27039569
http://www-01.ibm.com/support/docview.wss?rs=171&uid=swg27008375
http://www-01.ibm.com/support/docview.wss?uid=swg27041673&aid=1
Types of triggering:
1. Channel Triggering
2. Application Triggering
3. Client Triggering
Modes of Triggering
Trigger on first message- Call a program when depth of queue goes from 0 to 1
Trigger on every message- Call a program for every message entering the queue
Trigger on depth- Call a program when depth of queue gets to a certain number like on 10 messages
In this tutorial I will display the minimal steps to start the application triggering
High level steps for Application triggering
a) Create an initiation queue or use the default SYSTEM.DEFAULT.INITIATION.QUEUE.
b) Create a process definition.
c) Create or alter a local or model queue.
d) Associate the initiation queue and process definition with the local queue, and specify the trigger attributes .
Environment Details :
MQ Version : 7.0
OS : Redhat Linux
TYPE : Application Triggering
MODE : FIRST,EVERY,DEPTH
For a QUICK REFERENCE on TRIGGERING refer to http://webspherepundit.com/?p=1699
######################################################################################
######################################################################################
Example 1
Trigerring Scenario : To start the http process on a First message put in the Queue
Assumption
a) The http process can be started an stopped using mqm user ( the method to stop/start http as mqm is not covered in this tutorial .. may be for some other day
NOTE : It can be any process/script which you want to start , I used it to get the proper understanding of starting a process using trigerring
b) Your queue manager is created and started
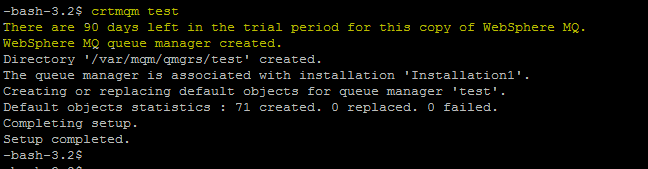
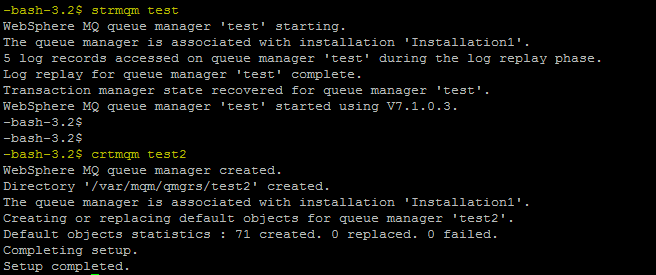
NOTE : create a queue manager : crtmqm QMC01
Start the queue manager : strmqm QMC01
Step1 : Start the queue manager QMC01
As user mqm .. start the queue manager QMC01
Step2 : Launch the MQSC prompt for the queue manager QMC01 using runmqsc

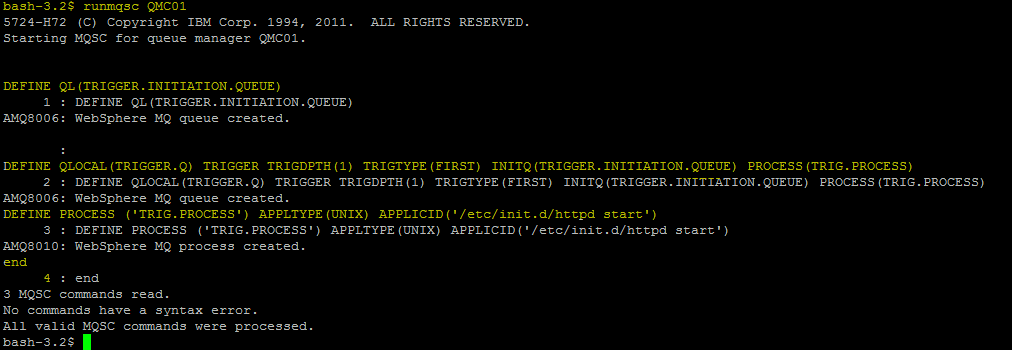
Step3 : Initiation Queue : Create an Initiation queue which the trigger monitor process will monitor
| DEFINE QL(TRIGGER.INITIATION.QUEUE) like SYSTEM.DEFAULT.INITIATION.QUEUE |

Step4 : Local Queue with Trigerring: Define a Local queue where you want the triggering to be set
NOTE : We will set the MODE as FIRST ie on the First message which the queue receives the trigger will be enabled and for the subsequent message the trigger will not be fired
| DEFINE QLOCAL(TRIGGER.Q) TRIGGER TRIGDPTH(1) TRIGTYPE(FIRST) INITQ(TRIGGER.INITIATION.QUEUE) PROCESS(TRIG.PROCESS) |

Step5 : Process Definition : Define the Process which needs to be started by the trigger
In this case its ‘/etc/init.d/httpd start’
| DEFINE PROCESS (‘TRIG.PROCESS’) APPLTYPE(UNIX) APPLICID(‘/etc/init.d/httpd start’) |

Complete Sample
Testing for Example 1
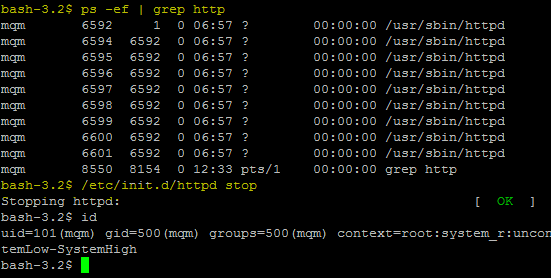
Step1 : Stopping httpd as mqm to simulate the testing
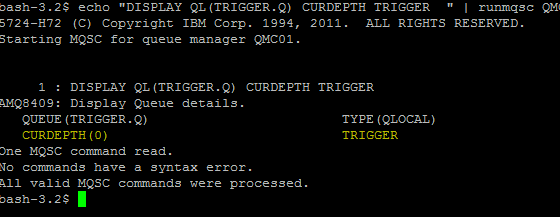
Step2 : Check the Message depth of the Trigger Queue .. it will be zero now
| bash-3.2$ echo “DISPLAY QL(TRIGGER.Q) CURDEPTH TRIGGER ” | runmqsc QMC01 |
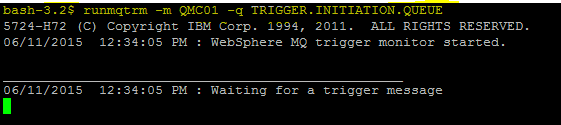
Step3 : Start the MQ triggering Process which will monitor the initiation queue
| bash-3.2$ runmqtrm -m [QMGR Name] -q [INITIATION QUEUE] |
It can be run in the background using
| bash-3.2$ runmqtrm -m [QMGR Name] -q [INITIATION QUEUE] & |
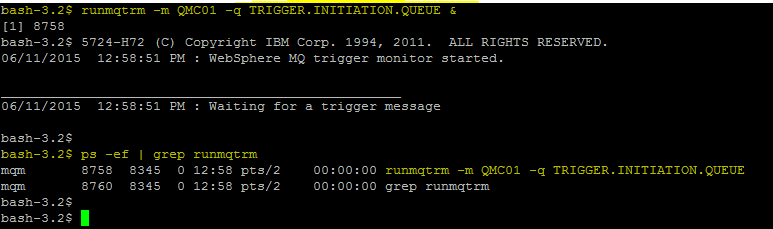
runmqtrm can be run as a service too in MQ & It will be covered later in this blog
| bash-3.2$ runmqtrm -m QMC01 -q TRIGGER.INITIATION.QUEUE |
Step4 :
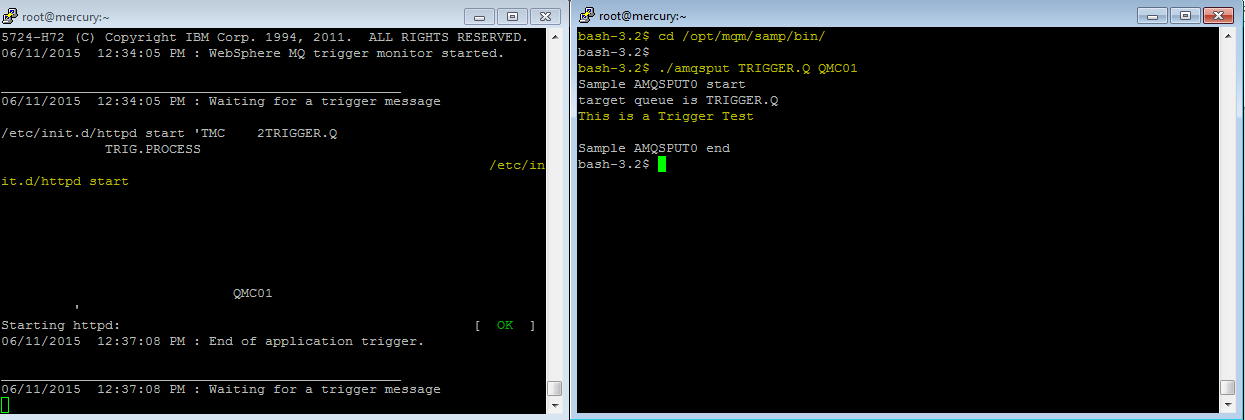
Open another Putty session and Put the Message to the TRIGGER.Q and see the response of the runmqtrm on the other session
Put a message in TRIGGER.Q using ./amqsput TRIGGER.Q
Step5 : Check the TRIGGER.Q depth count it will be “1”
| bash-3.2$ echo “DISPLAY QL(TRIGGER.Q) CURDEPTH TRIGGER ” | runmqsc QMC01 |

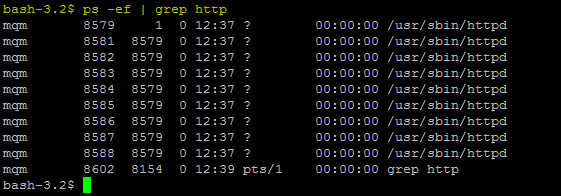
Step6 : Check the http process .. it should be started now using ps –ef | grep http
######################################################################################
######################################################################################
Example 2
Trigerring Scenario : Enable triggering to start a unix script with a receipt of a message
In this example we will be running a script instead of starting a process with trigerring set for FIRST( ie On the arrival of the first message )
Step1 : Create a test script as per the sample below (It can be any script of your choice)
This script will use amqsgbr output and send it to a file /var/mqm/script.log
Create a script file testscript.sh
bash-3.2$ vi /var/mqm/testscript.sh
############################
echo `date` >> /var/mqm/script.log
/opt/mqm/samp/bin/amqsgbr TRIGGER.Q QMC01 | grep “[1-9] <” >> /var/mqm/script.log
echo “==========================” >> /var/mqm/script.log
############################
|

Step2 : Change the permission to make it executable
| bash-3.2$ chmod 755 /var/mqm/testscript.sh |
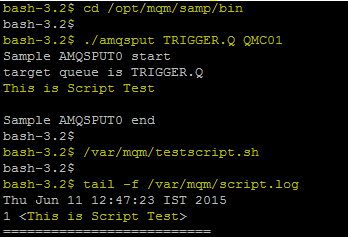
Step3 : Testing the script : Test this script works
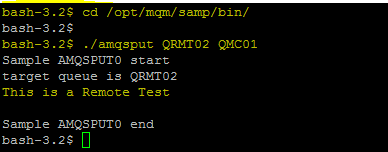
bash-3.2$ cd /opt/mqm/samp/bin
bash-3.2$ ./amqsput TRIGGER.Q QMC01
Sample AMQSPUT0 start
target queue is TRIGGER.Q
This is Script TestSample AMQSPUT0 end
bash-3.2$bash-3.2$ /var/mqm/testscript.sh
bash-3.2$
bash-3.2$ tail -f /var/mqm/script.log
Thu Jun 11 12:47:23 IST 2015 |
Enabling Triggering to run this script
Now that we know the script works , Put it for triggering
Step1 : We will use the same example1 only we will alter the process definition with APPLICID(‘ /var/mqm/testscript.sh’)
we will alter APPLICID(‘/etc/init.d/httpd start’)” with APPLICID(‘ /var/mqm/testscript.sh’)
| ALTER PROCESS (‘TRIG.PROCESS’) APPLTYPE(UNIX) APPLICID(‘/var/mqm/testscript.sh’) |

Step2 : Check the Queue Depth of Trigger Queue .. IT should be “Zero”
| bash-3.2$ echo “DISPLAY QL(TRIGGER.Q) CURDEPTH TRIGGER ” | runmqsc QMC01 | grep CURDEPTH |

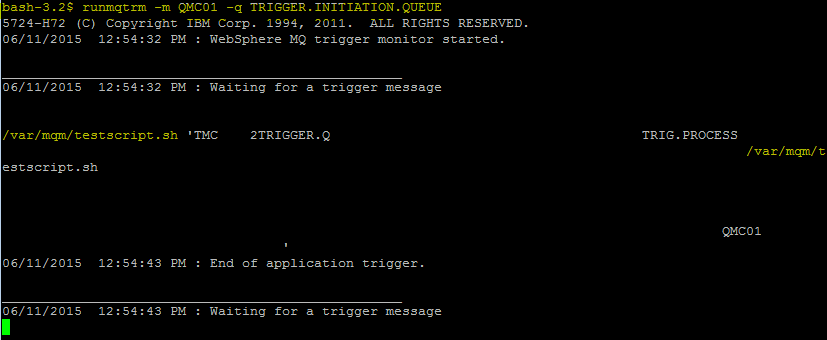
Step3 : Run the “runmqtrm” command
| bash-3.2$ runmqtrm -m QMC01 -q TRIGGER.INITIATION.QUEUE |
Testing for Example 2
NOTE: use ./amqsget TRIGGER.Q or CLEAR TRIGGER.Q to clear the messages in TRIGGER.Q before starting the test
Step1: Put a message in the TRIGGER.Q
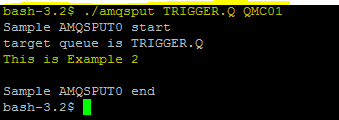
Step2 : View the runmqtrm console
Step3 : Tail the script has run by seeing the logs

Now even if we put more messages in the Queue TRIGGER.Q the trigger will only happen once ( ie the First message ie when the Queue Depth goes from Zero to One .
For eg : The initial queue depth of “TRIGGER.Q” is zero .. Then I put 3 messages in it
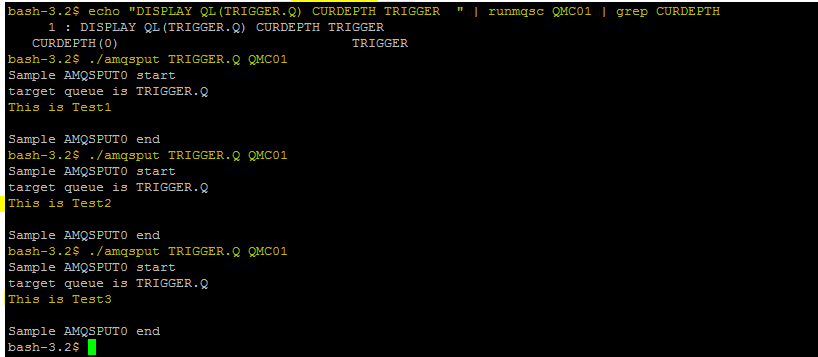

But with the runmqtrm we see that the script only ran only ONCE.
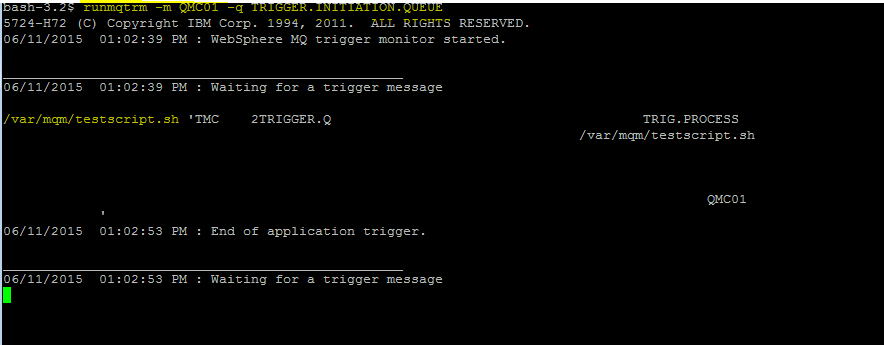

With this we have simulated a situation wherein the only the first message to a queue ( Queue depth Zero to One) will trigger the script to run
######################################################################################
######################################################################################
Example 3
Trigerring Scenario : We will Test the Trigerring method for EVERY Message instead of the FIRST message entering the Trigger queue.
I will use the same object created in the previous Example 2
Step1 : Alter the Definitions of the TRIGGER.Q with TRIGTYPE(EVERY)
| ALTER QLOCAL(TRIGGER.Q) TRIGGER TRIGDPTH(1) TRIGTYPE(EVERY) INITQ(TRIGGER.INITIATION.QUEUE) PROCESS(TRIG.PROCESS) |

Step2 : Run the runmqtrm for the Initiation Queue
| bash-3.2$ runmqtrm -m QMC01 -q TRIGGER.INITIATION.QUEUE |
Testing for Example 3
Step1 : Check the Current Depth of the TRIGGER.Q its “Zero”
NOTE: use ./amqsget TRIGGER.Q or CLEAR TRIGGER.Q to clear the messages in TRIGGER.Q

Step2 :Clear the script logs

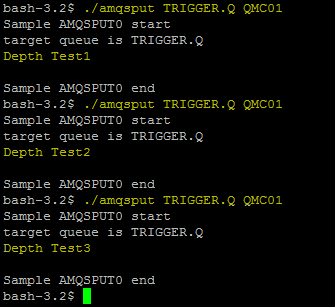
Step3 :Put 4 messages using amqsput TRIGGER.Q . So if our configurations are corrent for each message the trigger monitor will execute the testsctipt.sh
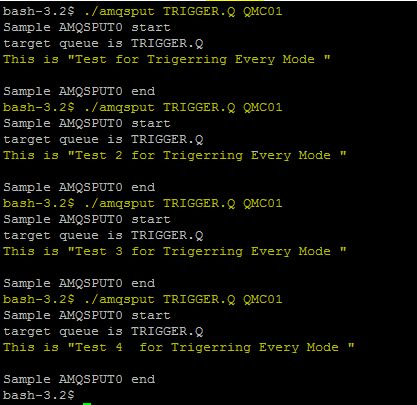
Step4 :Check the output of the trigger ie runmqtrm. You will see for each message the testscript.sh is run
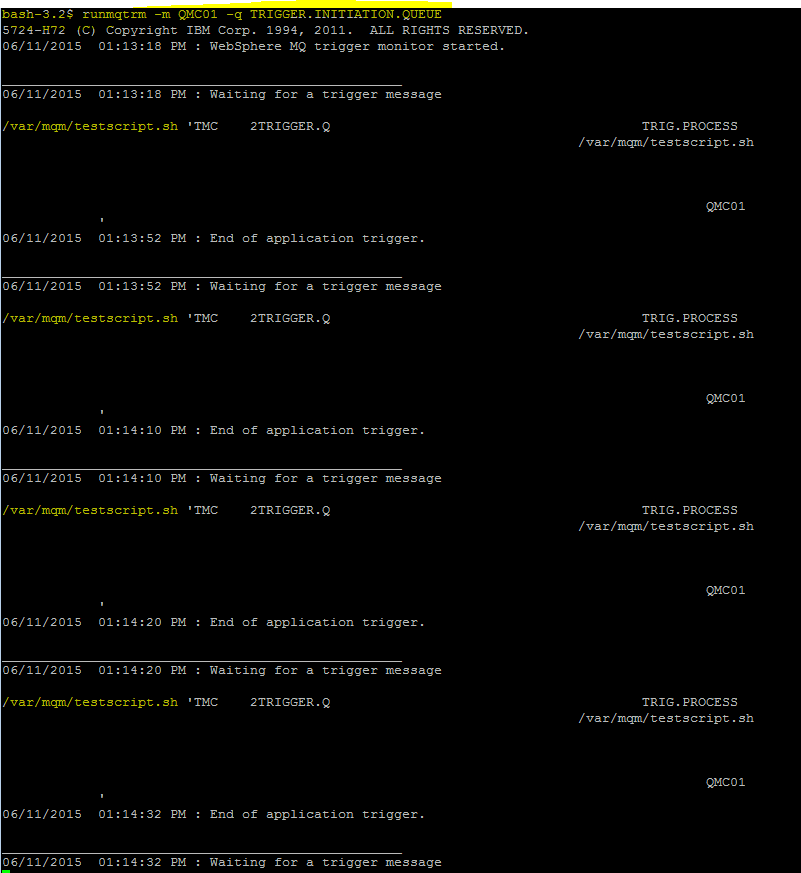
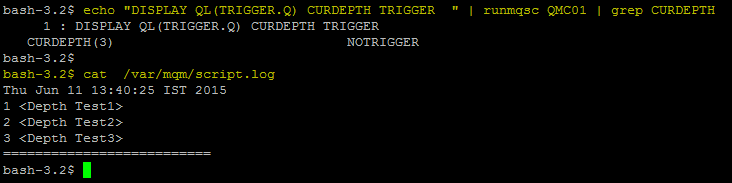
Step5 : Check the Logs to ensure the script has run for each trigger
| bash-3.2$ tail -f /var/mqm/script.log |
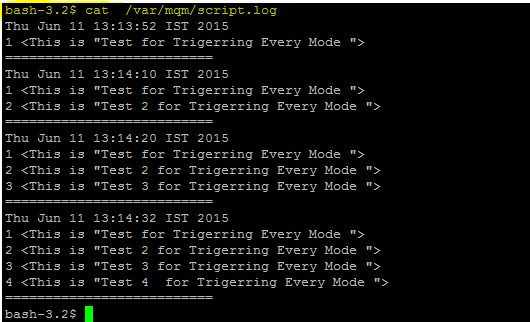
| bash-3.2$ echo “DISPLAY QL(TRIGGER.Q) CURDEPTH TRIGGER ” | runmqsc QMC01 | grep CURDEPTH |
######################################################################################
######################################################################################
Example 4
Trigerring Scenario : We will test the triggering for the Depth of the Queue ie when the QUEUE Depth reaches the defined setting a triggering should be fired
We will use the same Example 2 for this test
Step1 : Clear the queue TRIGGER.Q of the messages
bash-3.2$ ./amqsget TRIGGER.Q QMC01
bash-3.2$ >/var/mqm/script.log |

Step2 : Alter the Queue definitions for TRIGDPTH(3) TRIGTYPE(DEPTH)
| ALTER QLOCAL(TRIGGER.Q) TRIGGER TRIGDPTH(3) TRIGTYPE(DEPTH) INITQ(TRIGGER.INITIATION.QUEUE) PROCESS(TRIG.PROCESS) |

Step3 : Run the runmqtrm for the Initiation Queue
| bash-3.2$ runmqtrm -m QMC01 -q TRIGGER.INITIATION.QUEUE |
Testing for Example 4
Step1 : Put 3 messages in the Queue TRIGGER.Q .. Observe that until we put 3 messages in the TRIGGER.Q the triggering is not fired
Step2 :The trigger is run only one when the Queue Depth reaches 3 messages
Check the output of the script which writes to the logs script.log to ensure that the script has run only once when the Depth is 3
One thing to observe is that once the triggering is fired for TRIGTYPE( DEPTH) the triggering is disabled for the Queue
Here we can see that the Triggering is disabled “NOTRIGGER” onces the triggering is fired

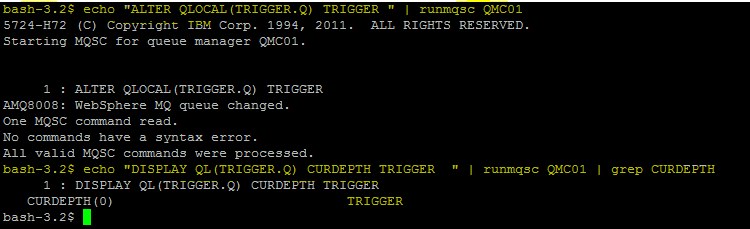
We need to enable TRIGGERING Again for the TRIGGER.Q as below
| bash-3.2$ echo “ALTER QLOCAL(TRIGGER.Q) TRIGGER ” | runmqsc QMC01 |
NOTE : An Application can use MQSET within it to re-enable the Triggering the QUEUE
######################################################################################
######################################################################################
Runmqtrm as a SERVICE
Instead of running runmqtrm from the putty prompt , A better way to runmqtrm is as a service
Step1 : Define Service
DEFINE SERVICE(TRIGMON) CONTROL(QMGR) SERVTYPE(SERVER) +
STARTCMD(‘+MQ_INSTALL_PATH+bin/runmqtrm’) +
STARTARG(‘-m +QMNAME+ -q SYSTEM.DEFAULT.INITIATION.QUEUE’) +
STOPCMD(‘+MQ_INSTALL_PATH+bin/amqsstop’) +
STOPARG(‘-m +QMNAME+ -p +MQ_SERVER_PID+’) STDOUT(‘/tmp/TrigMon.stdout’) +
STDERR(‘/tmp/TrigMon.stderr’) |

Step2 :Start the Service

Step3 :View the Services attributes
| DISPLAY SVSTATUS(TRIGMON) |
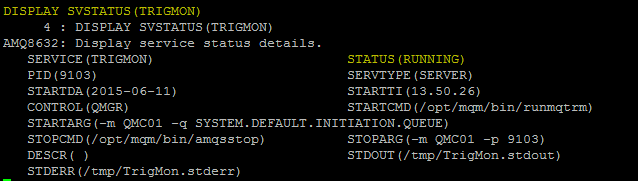

Step4 : Notice that the output files defined for the trigger monitor are created:
STDOUT(‘/tmp/TrigMon.stdout’)
STDERR(‘/tmp/TrigMon.stderr’) |
Step5 : List the OutPut files
bash-3.2$ ls -lt /tmp/Trig*
-rw-r–r– 1 mqm mqm 239 2014-03-20 13:18 /tmp/TrigMon.stdout
-rw-r–r– 1 mqm mqm 0 2014-03-20 13:18 /tmp/TrigMon.stderr |
bash-3.2$ cat /tmp/TrigMon.stdout
5724-H72 (C) Copyright IBM Corp. 1994, 2011. ALL RIGHTS RESERVED.
03/20/2014 01:18:24 PM : WebSphere MQ trigger monitor started.
__________________________________________________
03/20/2014 01:18:25 PM : Waiting for a trigger message |
At this point, notice that the trigger monitor has not handled any messages yet:
To get automated mail updates of my Posts..
Please subscribe to the site http://webspherepundit.com
And also like the Facebook Page
https://www.facebook.com/webspherepundit